.png)


Where to Place Widgets: A Page-by-Page Guide
Placing the right widget on the right page at the right time is critical for maximizing conversions without annoying your shoppers. This guide breaks down the essential Cavaco AI widgets you should install, categorized by page type, plus optional ideas to take your strategy further.
1. Sitewide (Global)
These widgets appear across your entire store, ensuring every visitor sees them regardless of which page they land on.
The Essentials
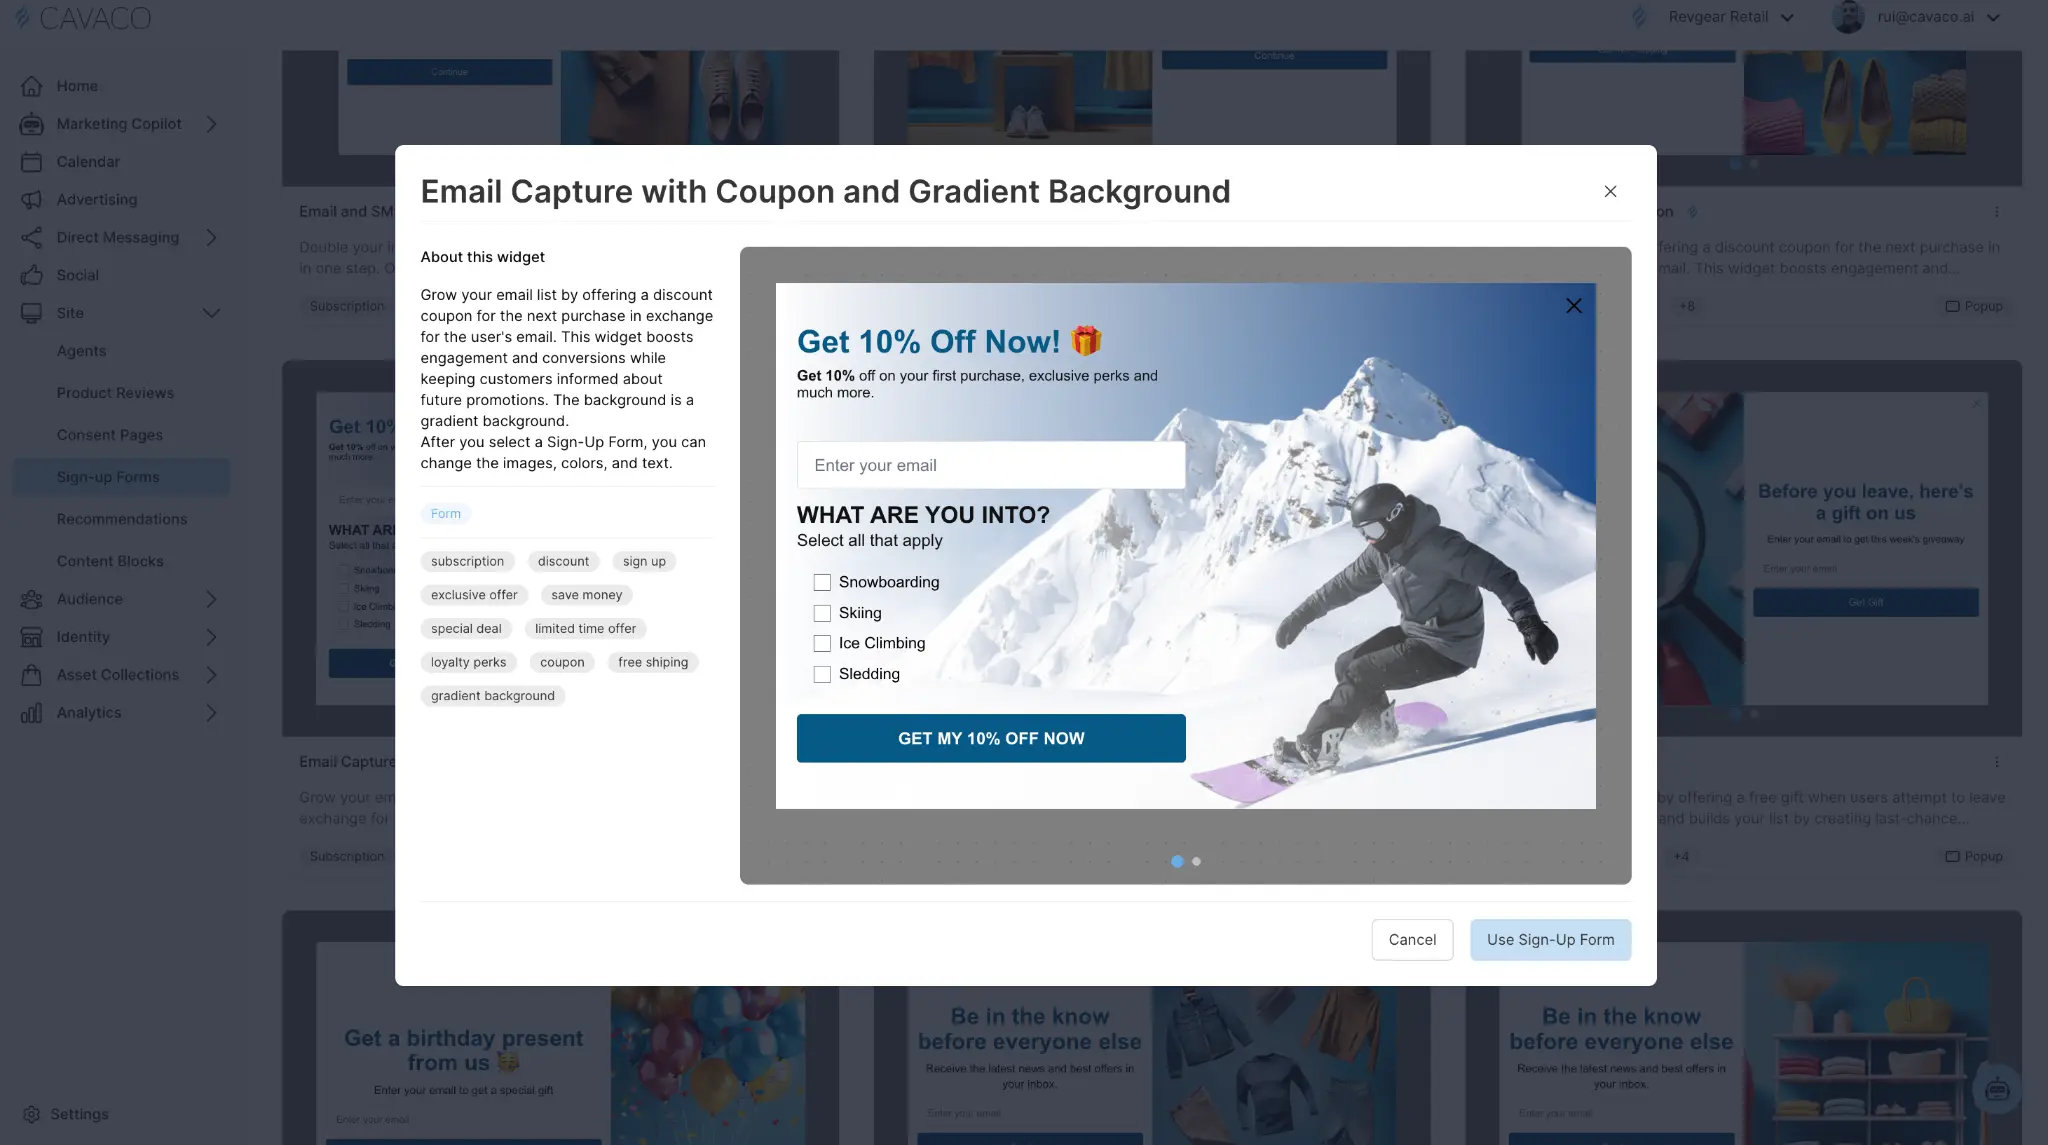
The Welcome Popup (Sign-Up Form): Offer a 10–15% discount in exchange for an email and/or phone number. Set the display timing to “After time delay” (e.g., 5–8 seconds) or “After scroll” to ensure they’ve had a moment to orient themselves before the popup appears.
The Announcement Banner (Content Block): A sticky top banner communicating your core value proposition (e.g., “Free Shipping on Orders Over $50” or “Easy 30-Day Returns”). This should be one of the first widgets you activate on a new store.
Optional / Advanced
Exit-Intent Flyout (Sign-Up Form): A secondary capture method that triggers only when the user’s mouse moves to leave the window. Keep the offer strong to save the session.
2. The Homepage
The homepage is your digital storefront. Widgets here should focus on discovery and guiding the shopper to their first product.
The Essentials
Trending Products (Recommendation): Use the “Trending” recipe to automatically showcase what’s currently popular. Embed this halfway down the page to catch scrolling visitors.
Optional / Advanced
New Arrivals (Recommendation): Use the “New Arrivals” recipe to highlight fresh inventory for returning customers.
3. The Product Description Page (PDP)
The PDP is where buying decisions happen. Widgets here must build trust and increase the Average Order Value (AOV).
The Essentials
Product Reviews & Star Ratings (Product Reviews): Embed the Star Reviews Rating immediately under the product title, and the full Product Reviews List at the bottom of the page above the footer.
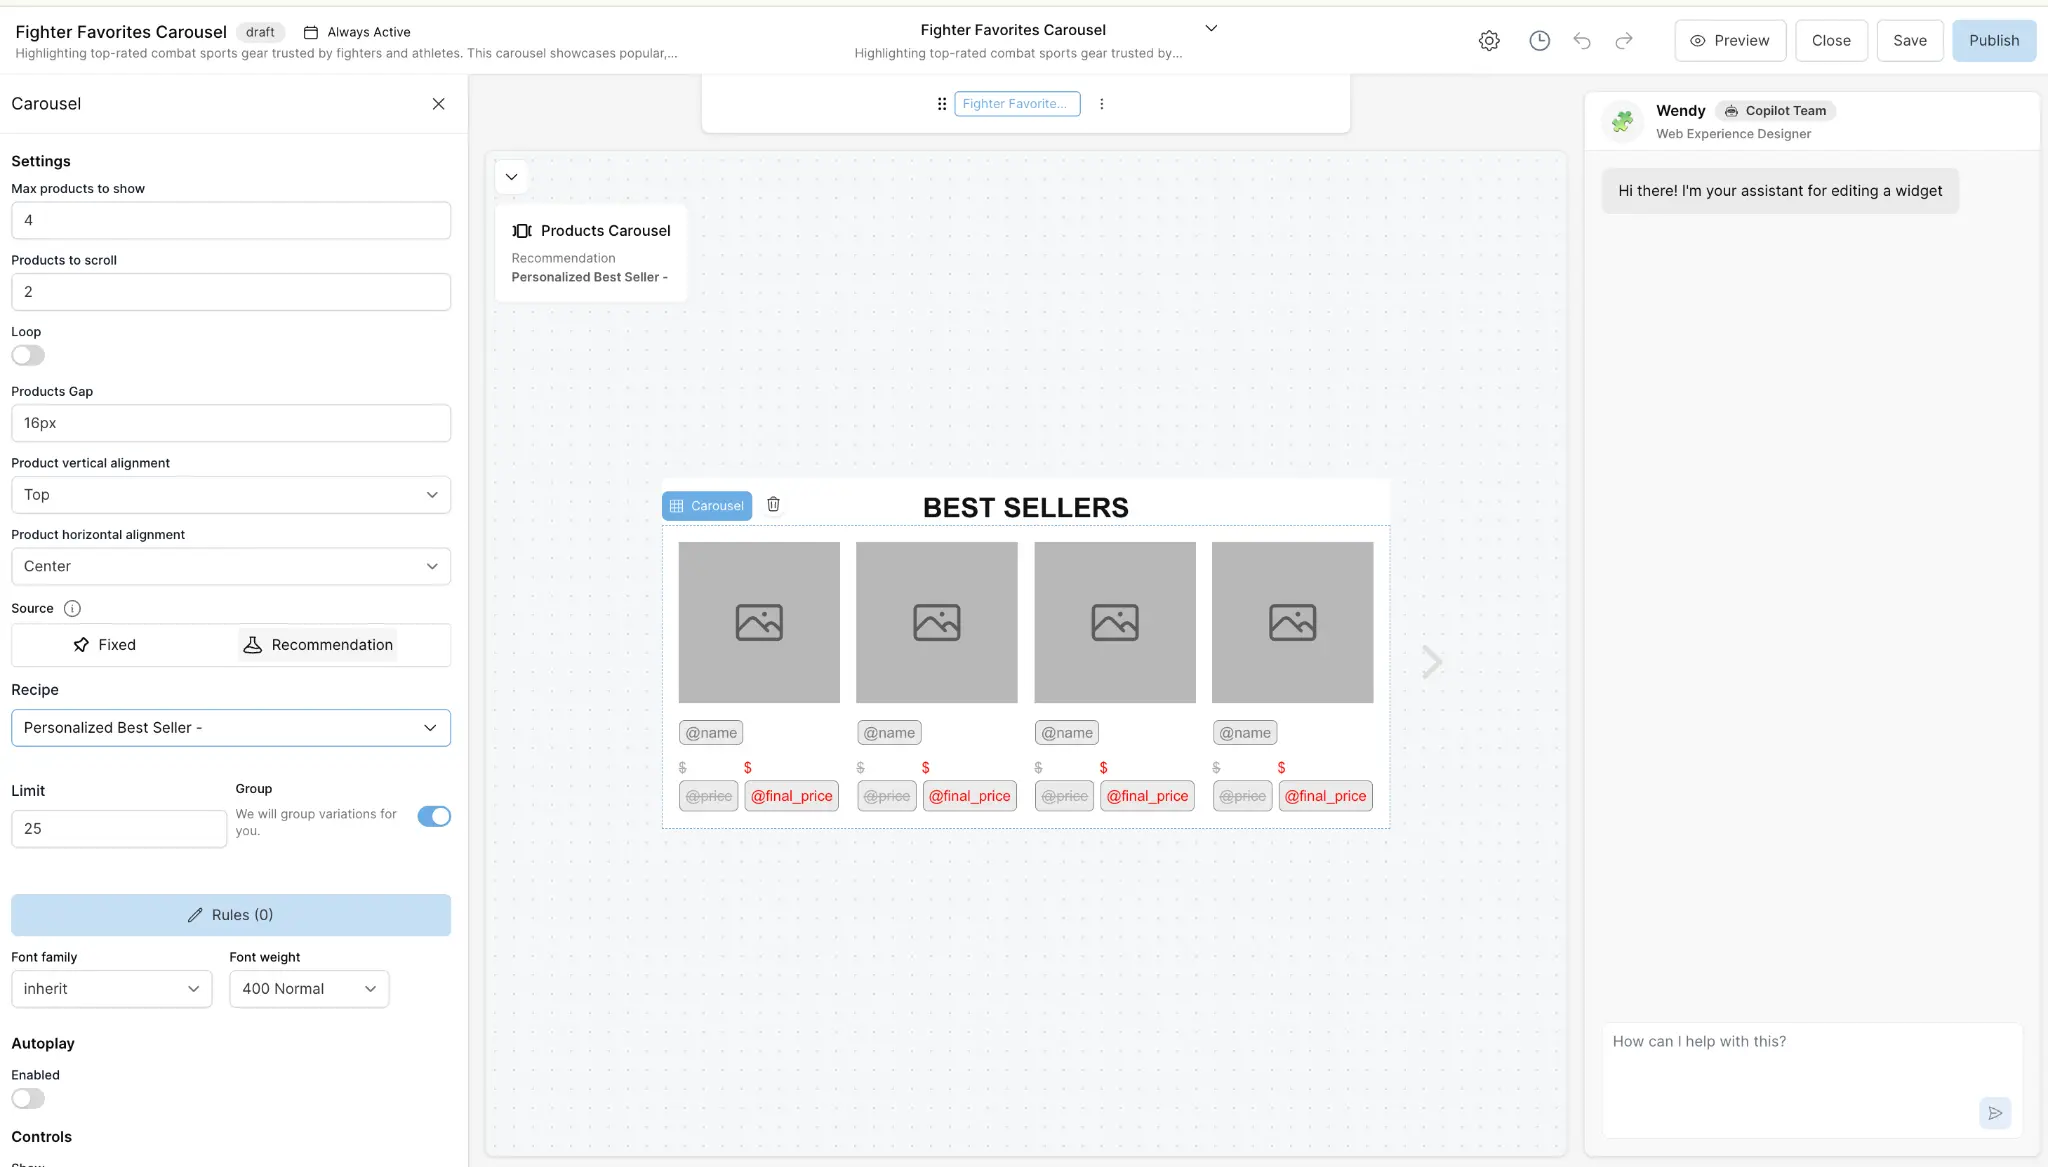
Frequently Bought Together (Recommendation): Use the “Co-occurrence” recipe to suggest complementary items directly below the Add to Cart button. The widget editor lets you configure the Recipe, set a product limit, and control the carousel layout — all without writing code.
Optional / Advanced
Similar Products (Recommendation): Use the “Similar” recipe at the bottom of the page. If the current product isn’t quite right, this keeps them browsing instead of bouncing.
4. The Shopping Cart (Slide-out or Dedicated Page)
The cart is your last chance to increase AOV before checkout. Widgets here must be highly relevant and frictionless.
The Essentials
In-Cart Cross-Sell (Recommendation): Embed a small recommendation carousel inside your slide-out cart or on the cart page. Use the “Context” or “Co-occurrence” recipe based on the items currently in the cart. Ensure these are low-friction, impulse-buy items — accessories, consumables, or complementary gear.
Optional / Advanced
Free Shipping Progress (Content Block): A dynamic banner in the cart showing “You’re only $X away from Free Shipping!” This is one of the highest-ROI widgets you can deploy.
5. The Checkout & Thank You Pages
Post-purchase is the beginning of the retention lifecycle. Capitalize on the shopper’s high engagement immediately after a successful order.
The Essentials
Post-Purchase Upsell (Recommendation): Place a recommendation widget on the Thank You page. Use the “Bestsellers” or “Trending” recipe. Customers are highly receptive to adding one more item immediately after a successful purchase.
Optional / Advanced
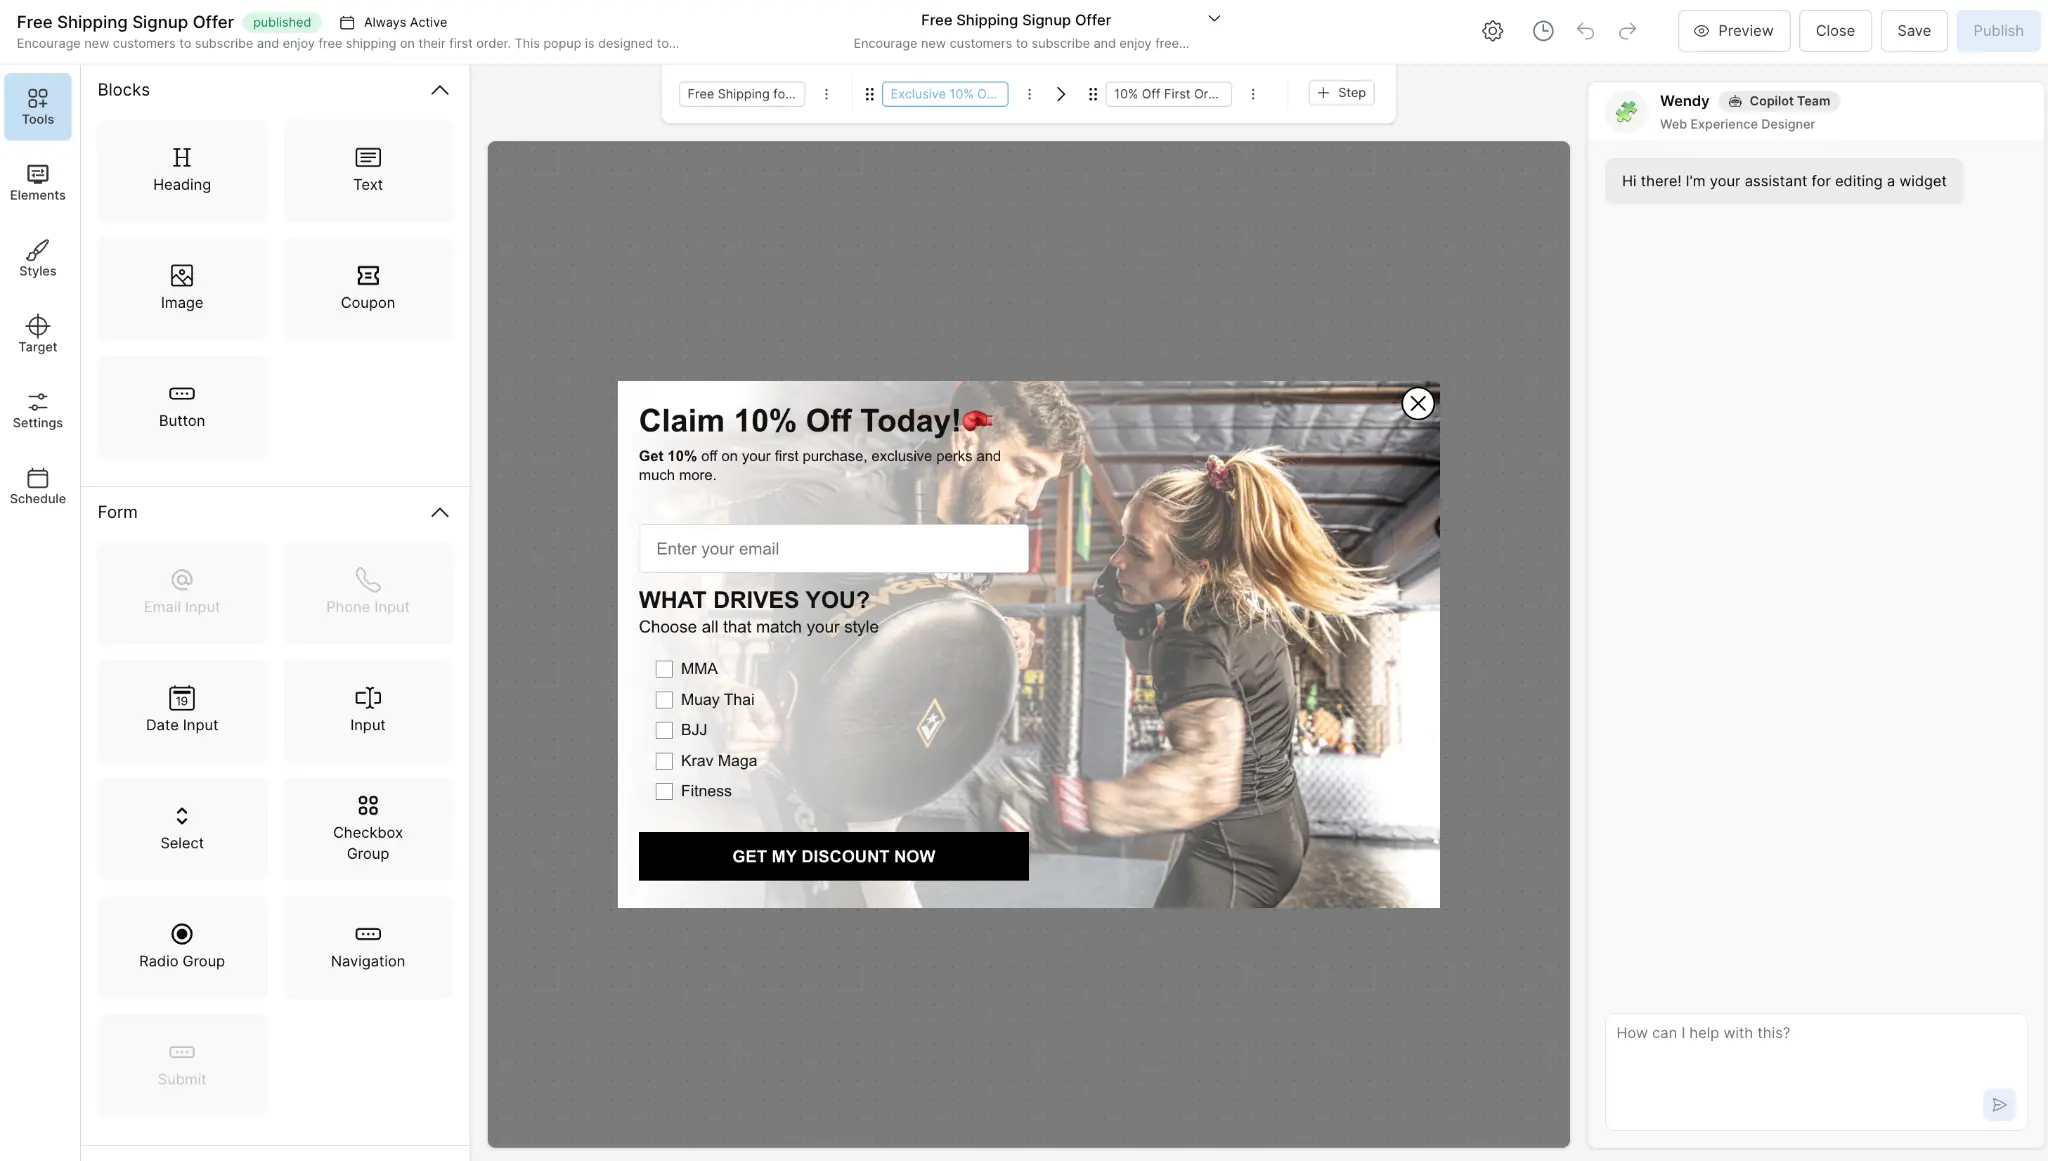
SMS Opt-in (Sign-Up Form Flyout): If you didn’t capture their phone number during checkout, trigger a post-purchase flyout offering order tracking via SMS. The Cavaco widget editor makes it straightforward to build a multi-step form that first confirms the order, then asks for a phone number.
.png)