Your contact database is one of your most valuable marketing assets. Cavaco AI allows you to import third-party contact lists, historical customer data, and leads from external providers (like Apollo or Salesgenie) directly into the platform to use in your marketing campaigns.
However, clean data is critical. Importing a list with a high bounce rate on a new IP will permanently damage your sender reputation, causing your emails to land in spam folders. This guide covers how to clean your list and properly import it into Cavaco AI.
1. Clean Your Email List (Mandatory)
Before uploading any external list to Cavaco AI, you must run it through a bounce filtering service. This process removes invalid, inactive, or "spam trap" email addresses that harm your deliverability.
We recommend using one of the following industry-standard services:
- ZeroBounce (Recommended for highest accuracy)
- Kickbox
- NeverBounce
How to clean your list:
- Export your current contact list as a CSV file from your old provider or lead source.
- Create an account with ZeroBounce, Kickbox, or NeverBounce.
- Upload your CSV file to their platform and run the cleaning process.
- Download the "Clean" or "Deliverable" results. Do not import "Catch-All", "Unknown", or "Invalid" emails into Cavaco AI.
2. Upload Your Dataset to Cavaco AI
Once you have your cleaned CSV file, you can upload it to Cavaco AI as a Dataset.
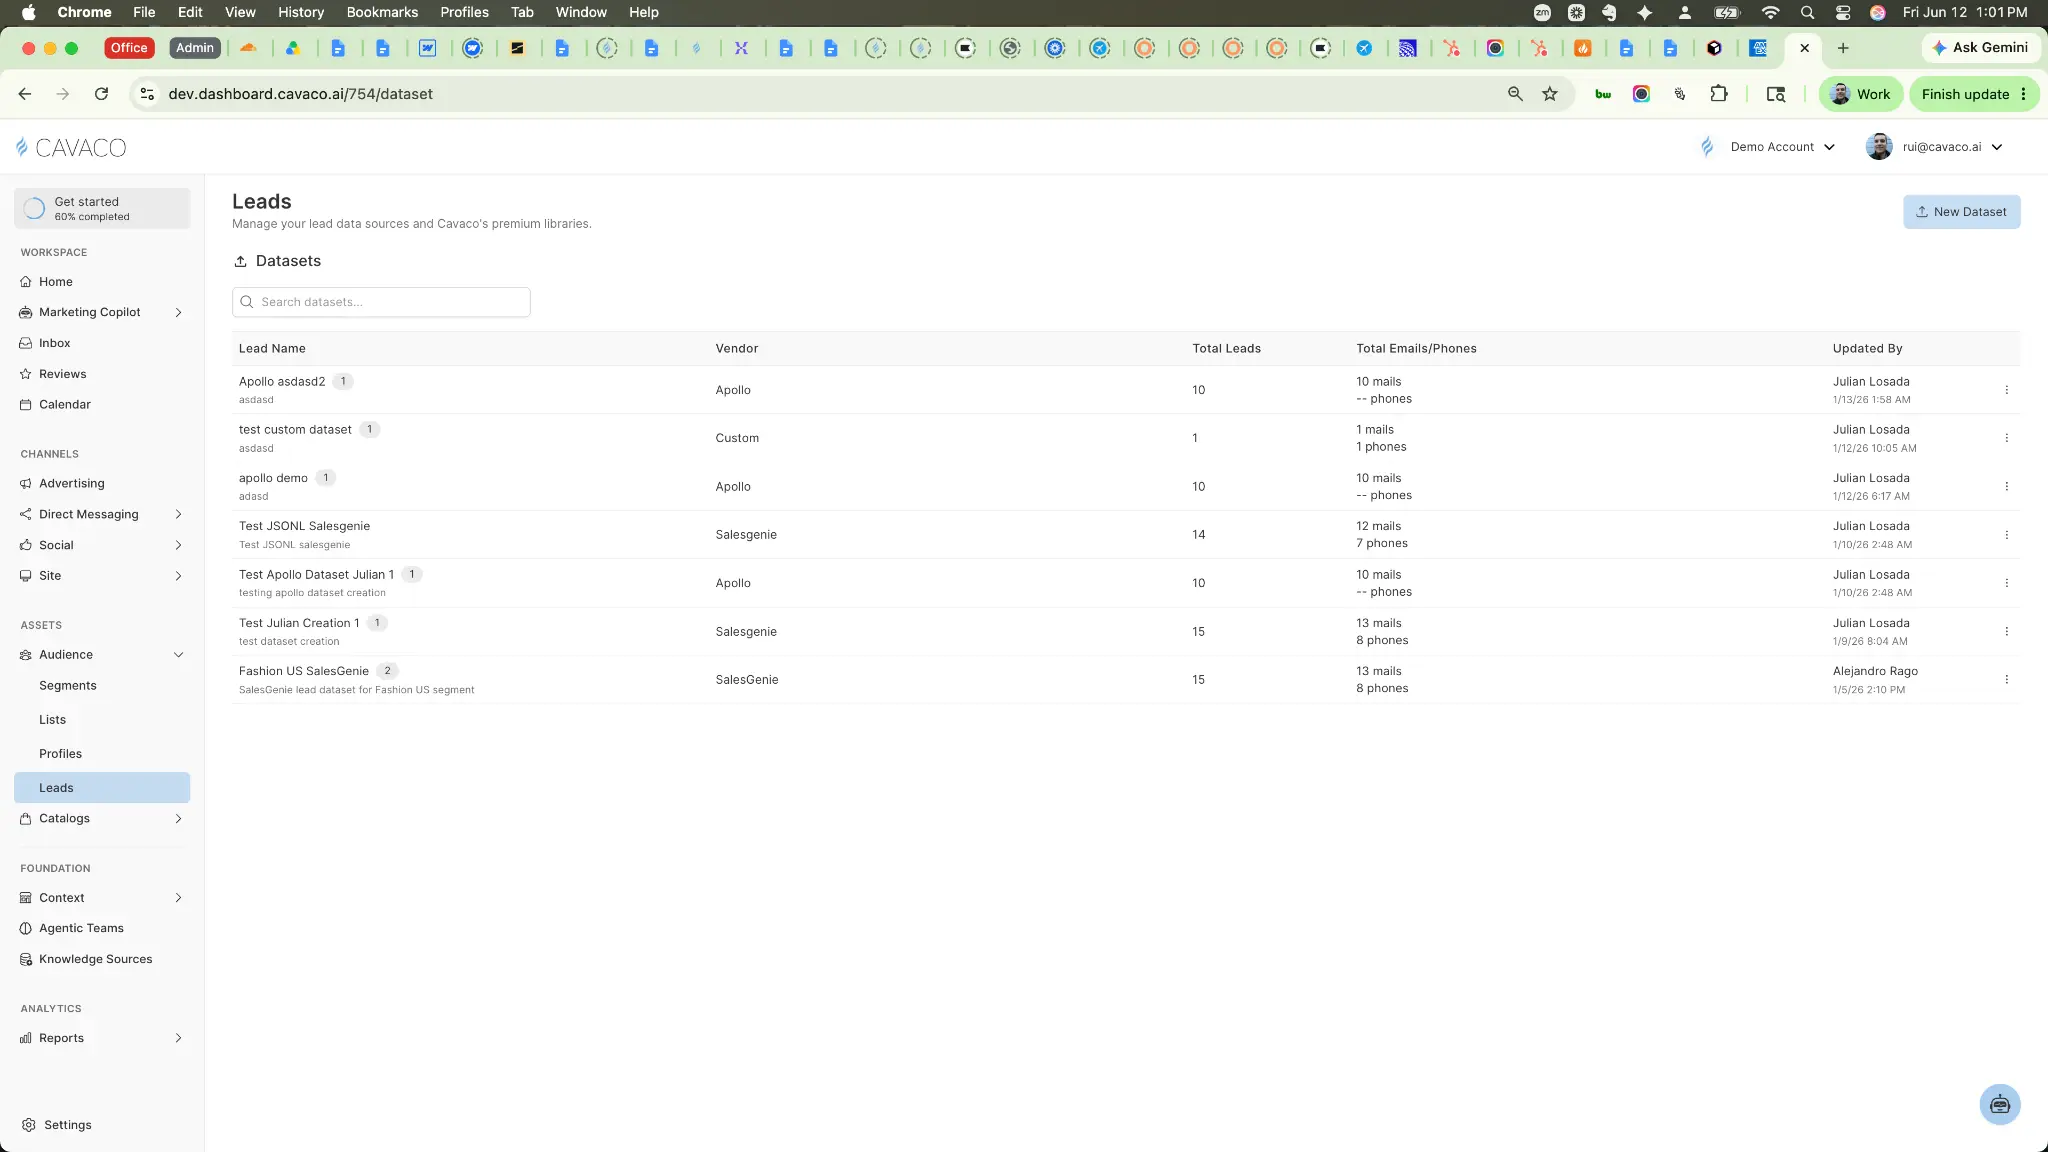
- In the Cavaco AI dashboard, navigate to Audience > Leads in the left sidebar.
- Click the + New Dataset button in the top right corner.
Configuring Your Dataset
In the Upload Lead Dataset dialog, you will need to provide the following details:
- File: Drag and drop your cleaned CSV, XLS, or TSV file.
- Name: Give your dataset a recognizable name (e.g., "Q1 2026 Cleaned Leads").
- Description: Add optional notes about the source or purpose of the list.
- Vendor: Select the source of your data. Cavaco AI has pre-built mappings for Salesgenie and Apollo. If your list is from another source, select Custom.
Custom Attribute Mapping
If you selected "Custom" as your vendor, you must map the columns in your CSV file to Cavaco AI attributes. This tells the system how to read your data.
Important: You must map at least one column to either the email or phone attribute for the upload to succeed.
- Under "Column Name", enter the exact header name from your CSV file (e.g., "Email Address").
- Under "Attribute", select the corresponding Cavaco AI attribute from the dropdown (e.g., "email").
- Click + Add Mapping to map additional fields like first name, last name, or custom properties.
- Click Upload & Process when finished.
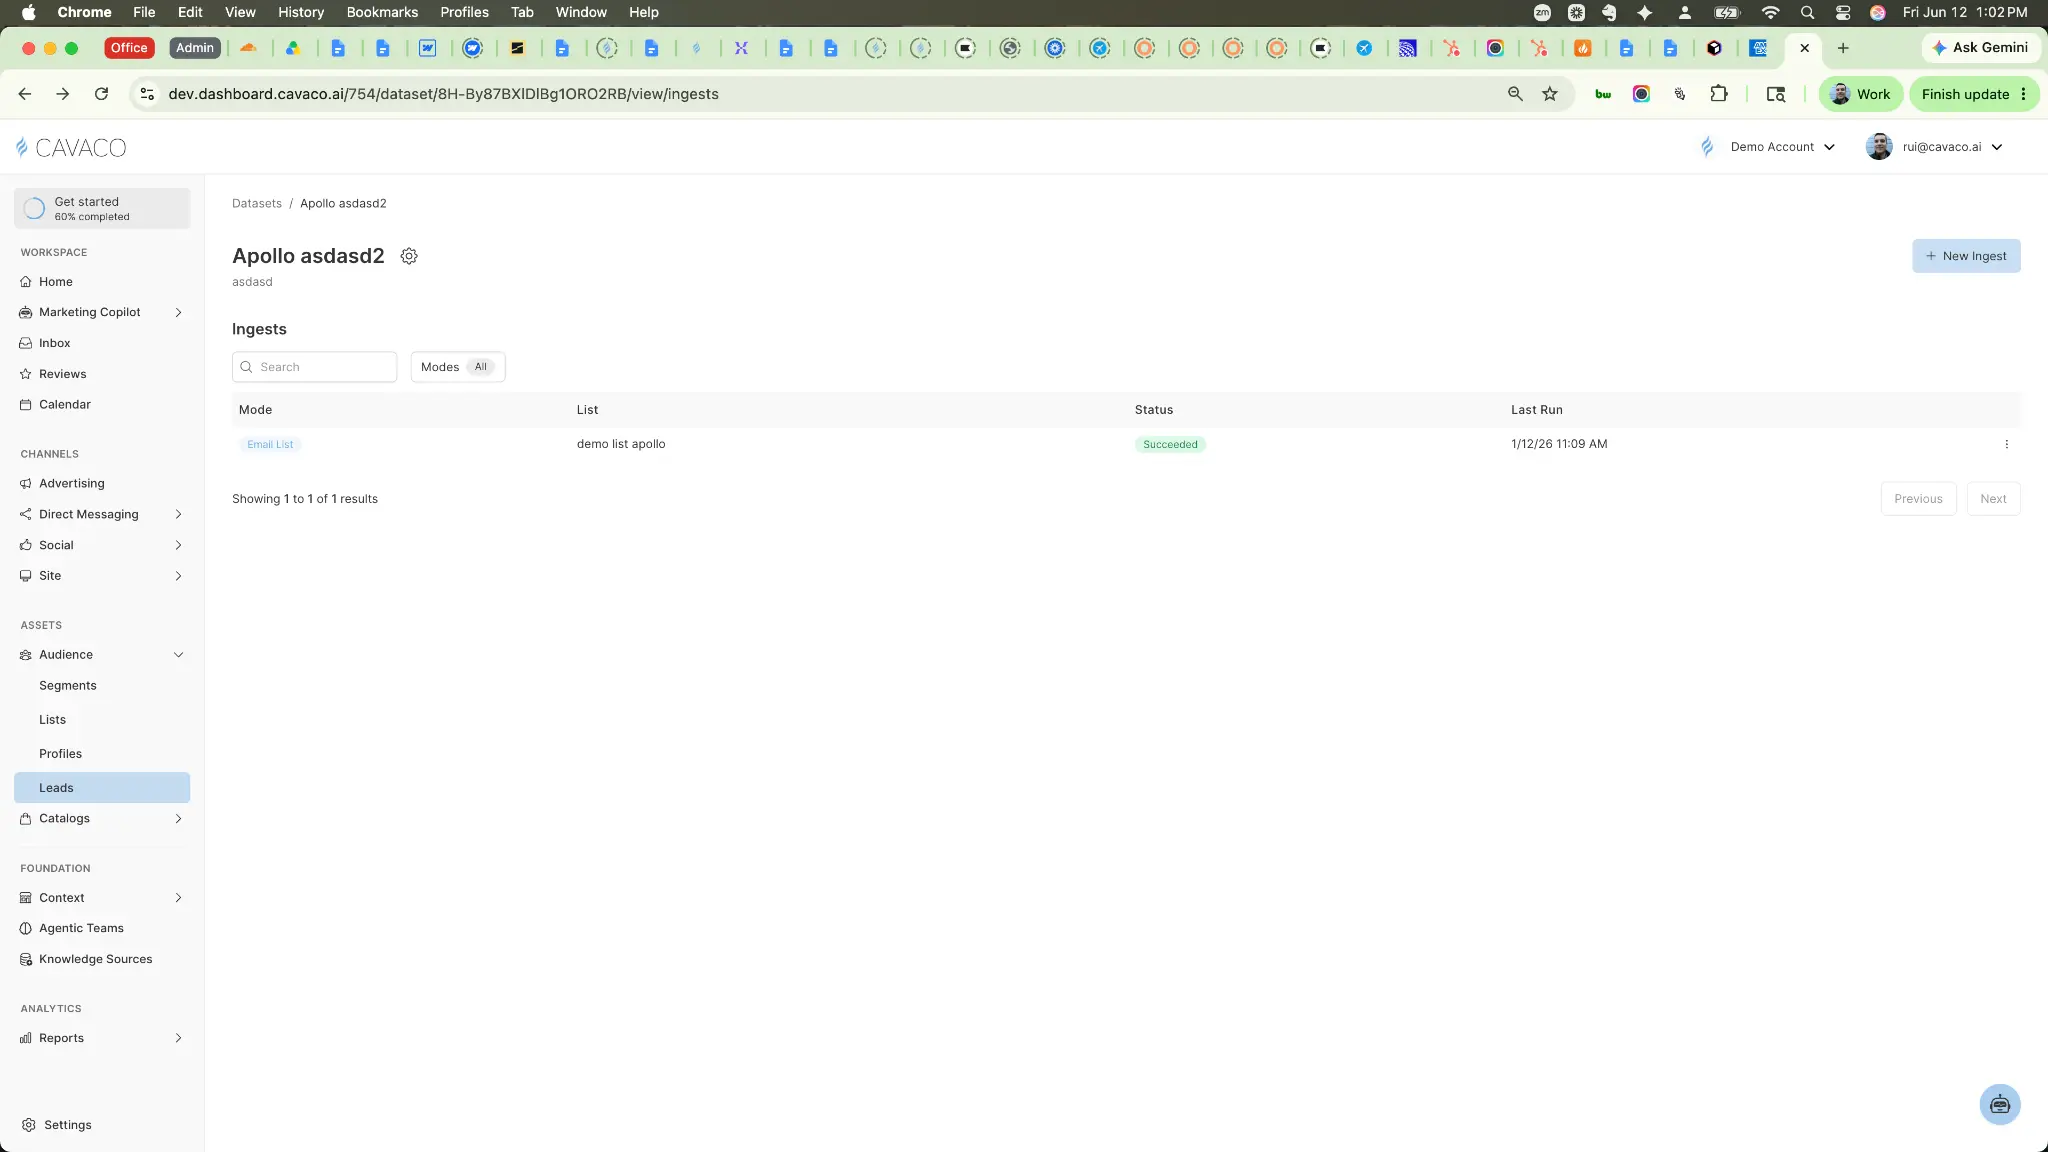
3. Create an Ingest
Uploading a dataset makes the raw data available in Cavaco AI. To actually use these contacts in campaigns, you need to create an Ingest to extract the emails or phone numbers into a usable List.
- From the Leads screen, click on the Dataset you just uploaded.
- Click the + New Ingest button.
- Select your Ingest Mode:
- Email List: Extracts emails for newsletters and drip campaigns.
- Phone List: Extracts phone numbers for SMS and WhatsApp campaigns.
- Profile Enrichment: Merges the data into existing customer profiles for advanced CDP segmentation.
- Select a destination List. You can either select an existing list from the dropdown or choose Create New List and provide a name.
- Click Create Ingest.
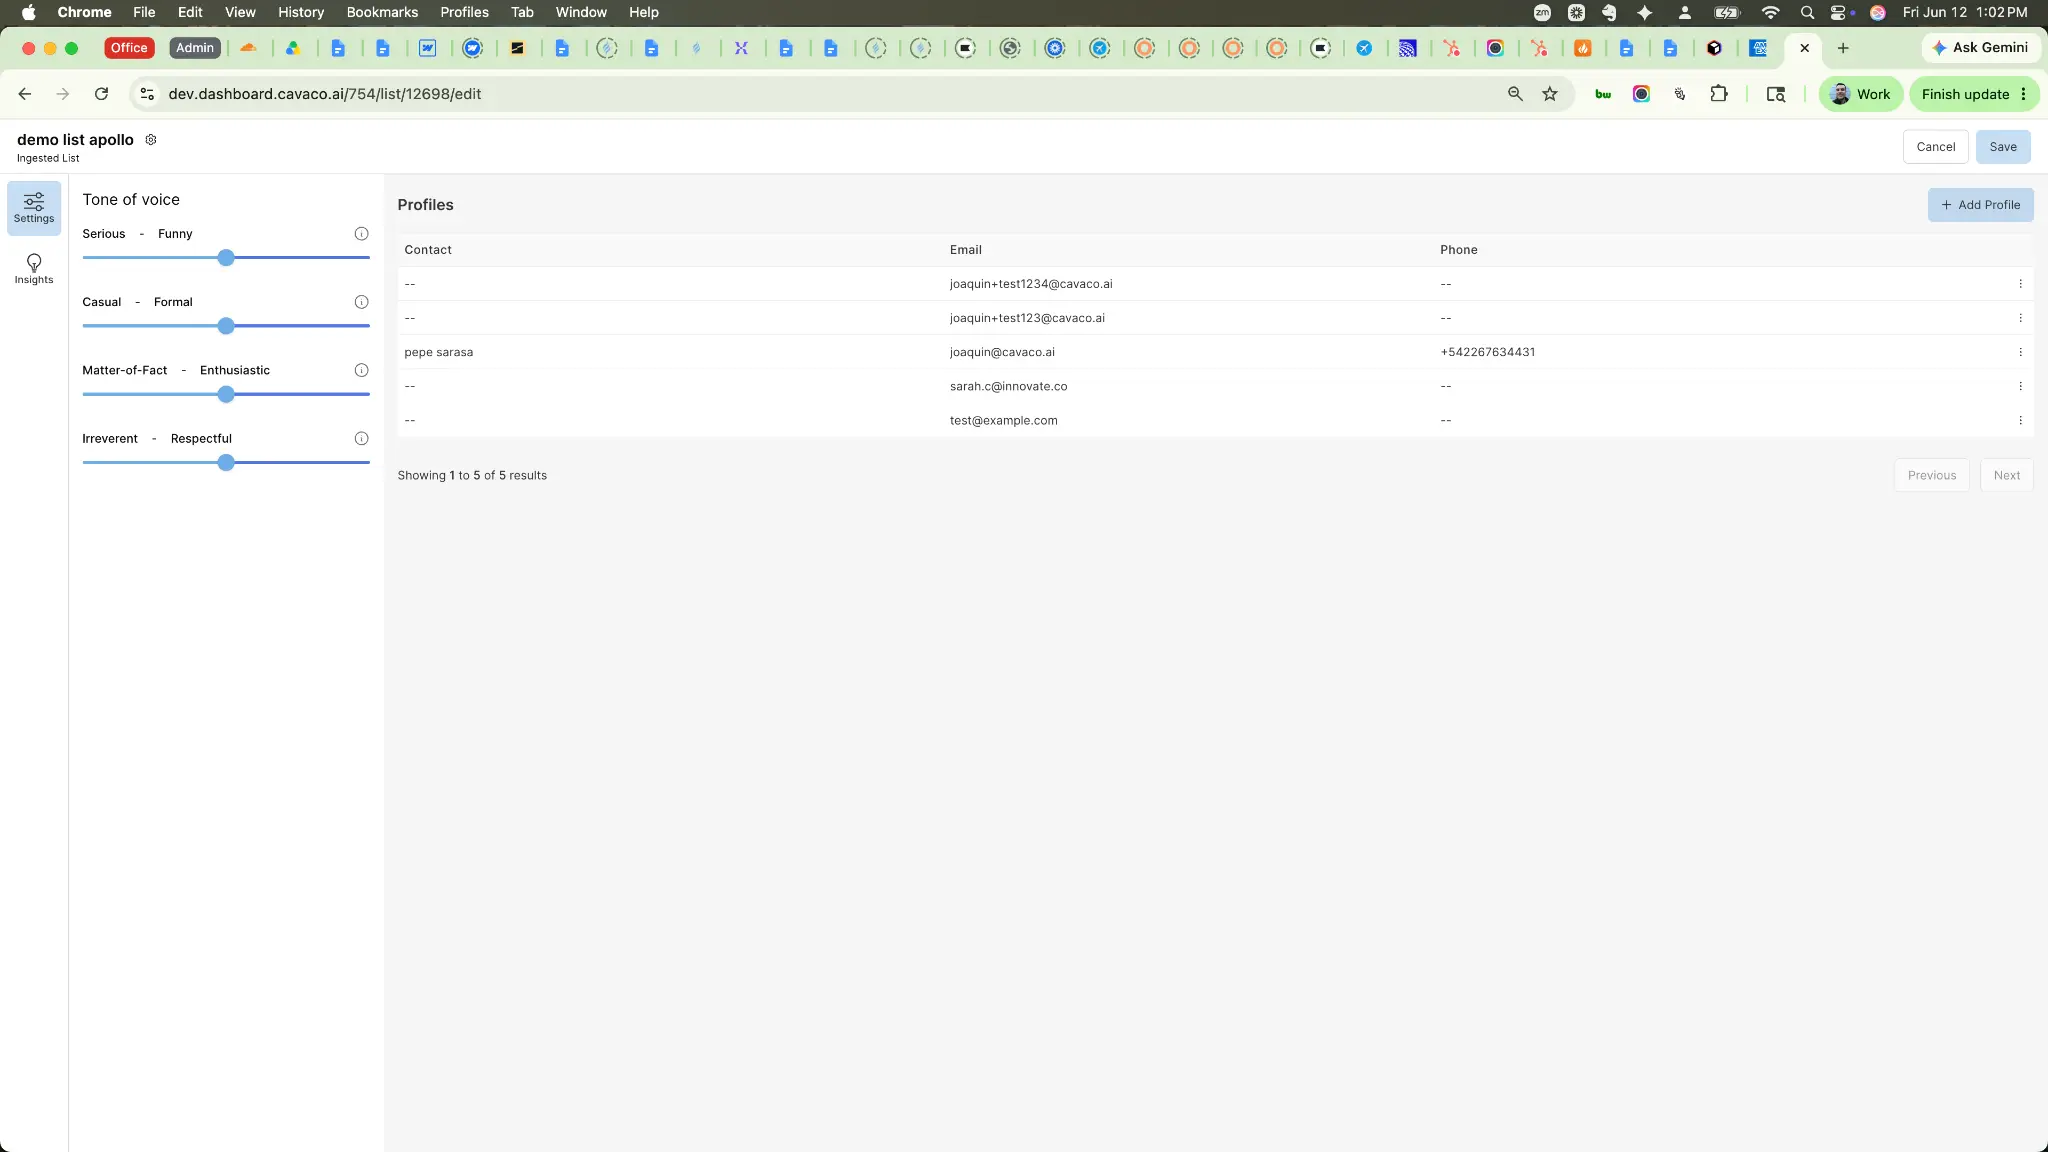
4. Verify Your Imported List
The ingest process will run in the background. Once the status changes to "Succeeded", your contacts are ready to use.
You can verify the import by navigating to Audience > Lists and clicking on the destination list you selected. You will see all the successfully imported profiles with their contact information, ready to be targeted in your next campaign.