Creating and Managing Scheduled Campaigns in Cavaco AI
Scheduled campaigns in Cavaco AI allow marketers to automate multi-step email, SMS, and WhatsApp campaigns on a timed schedule, either recurring or one-time. They are perfect for re-engagement, seasonal promotions, and nurturing flows—and can be built manually, generated by Cavaco AI Agent, or launched from the pre-built Campaign Library.
Prerequisites
Before creating any direct messaging campaign (Email, SMS, or WhatsApp), make sure the following elements are set up in your account:
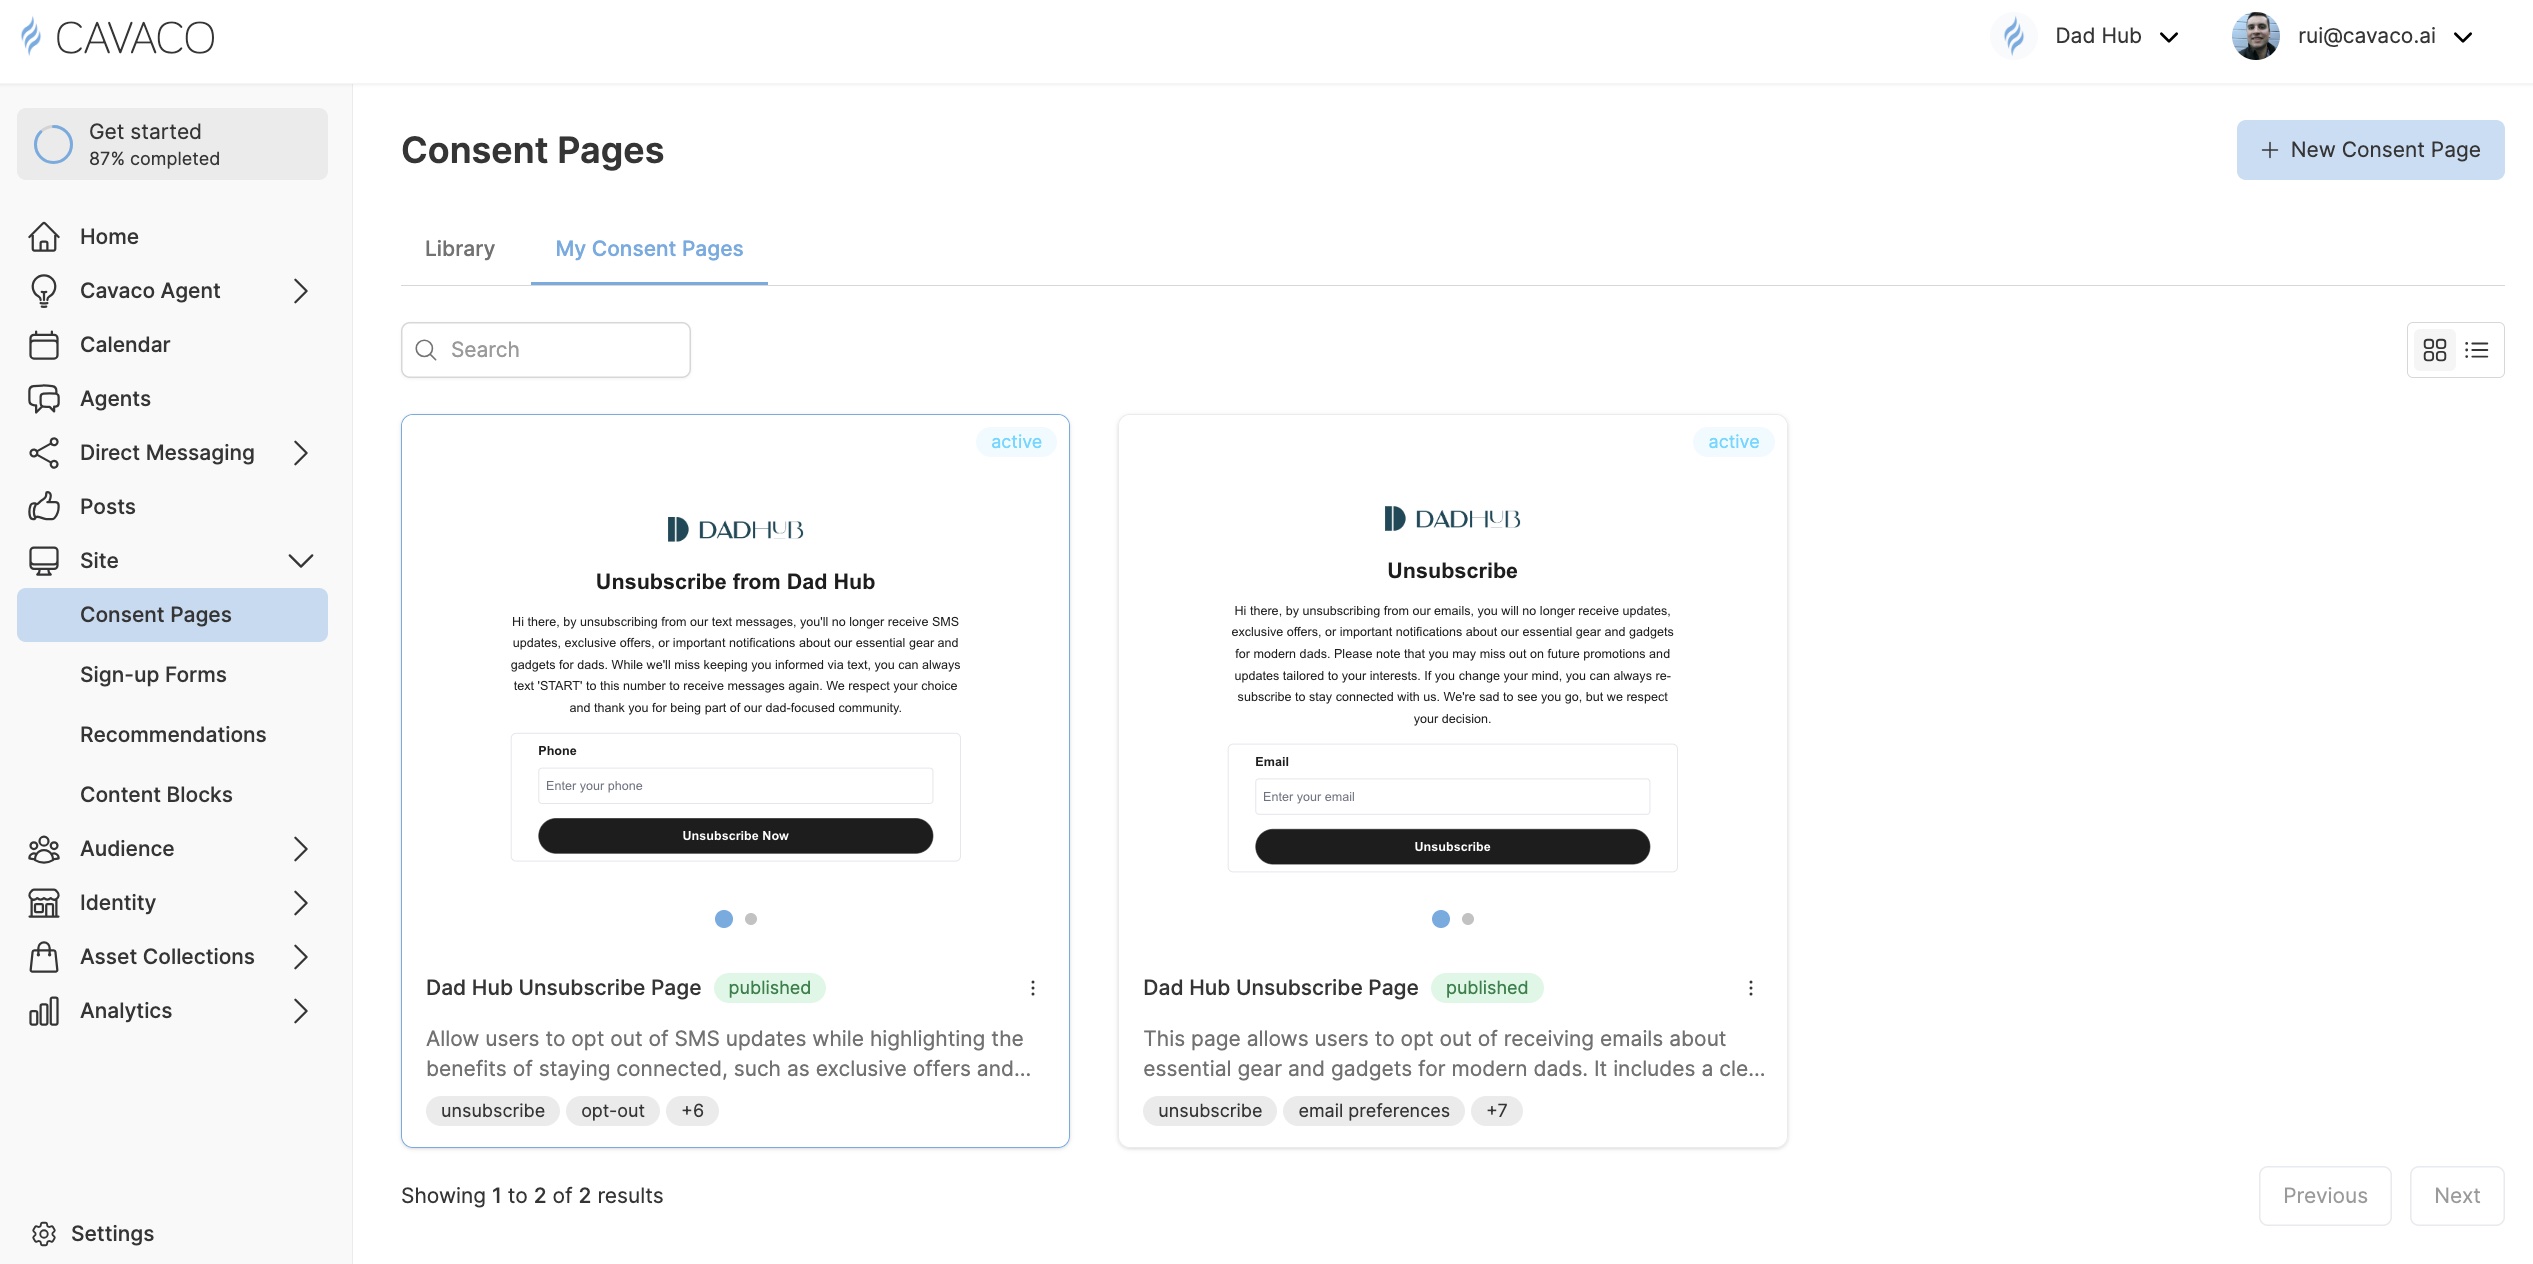
1. Consent Pages
You must have brand-compliant pages that:
- Let customers opt-in and opt-out of Email, SMS, and WhatsApp marketing.
- Clearly describe how you will use their contact info.
This is especially important for SMS in the U.S., where Cavaco AI must register your campaign with telecom providers and provide examples of your consent practices before assigning you a number.
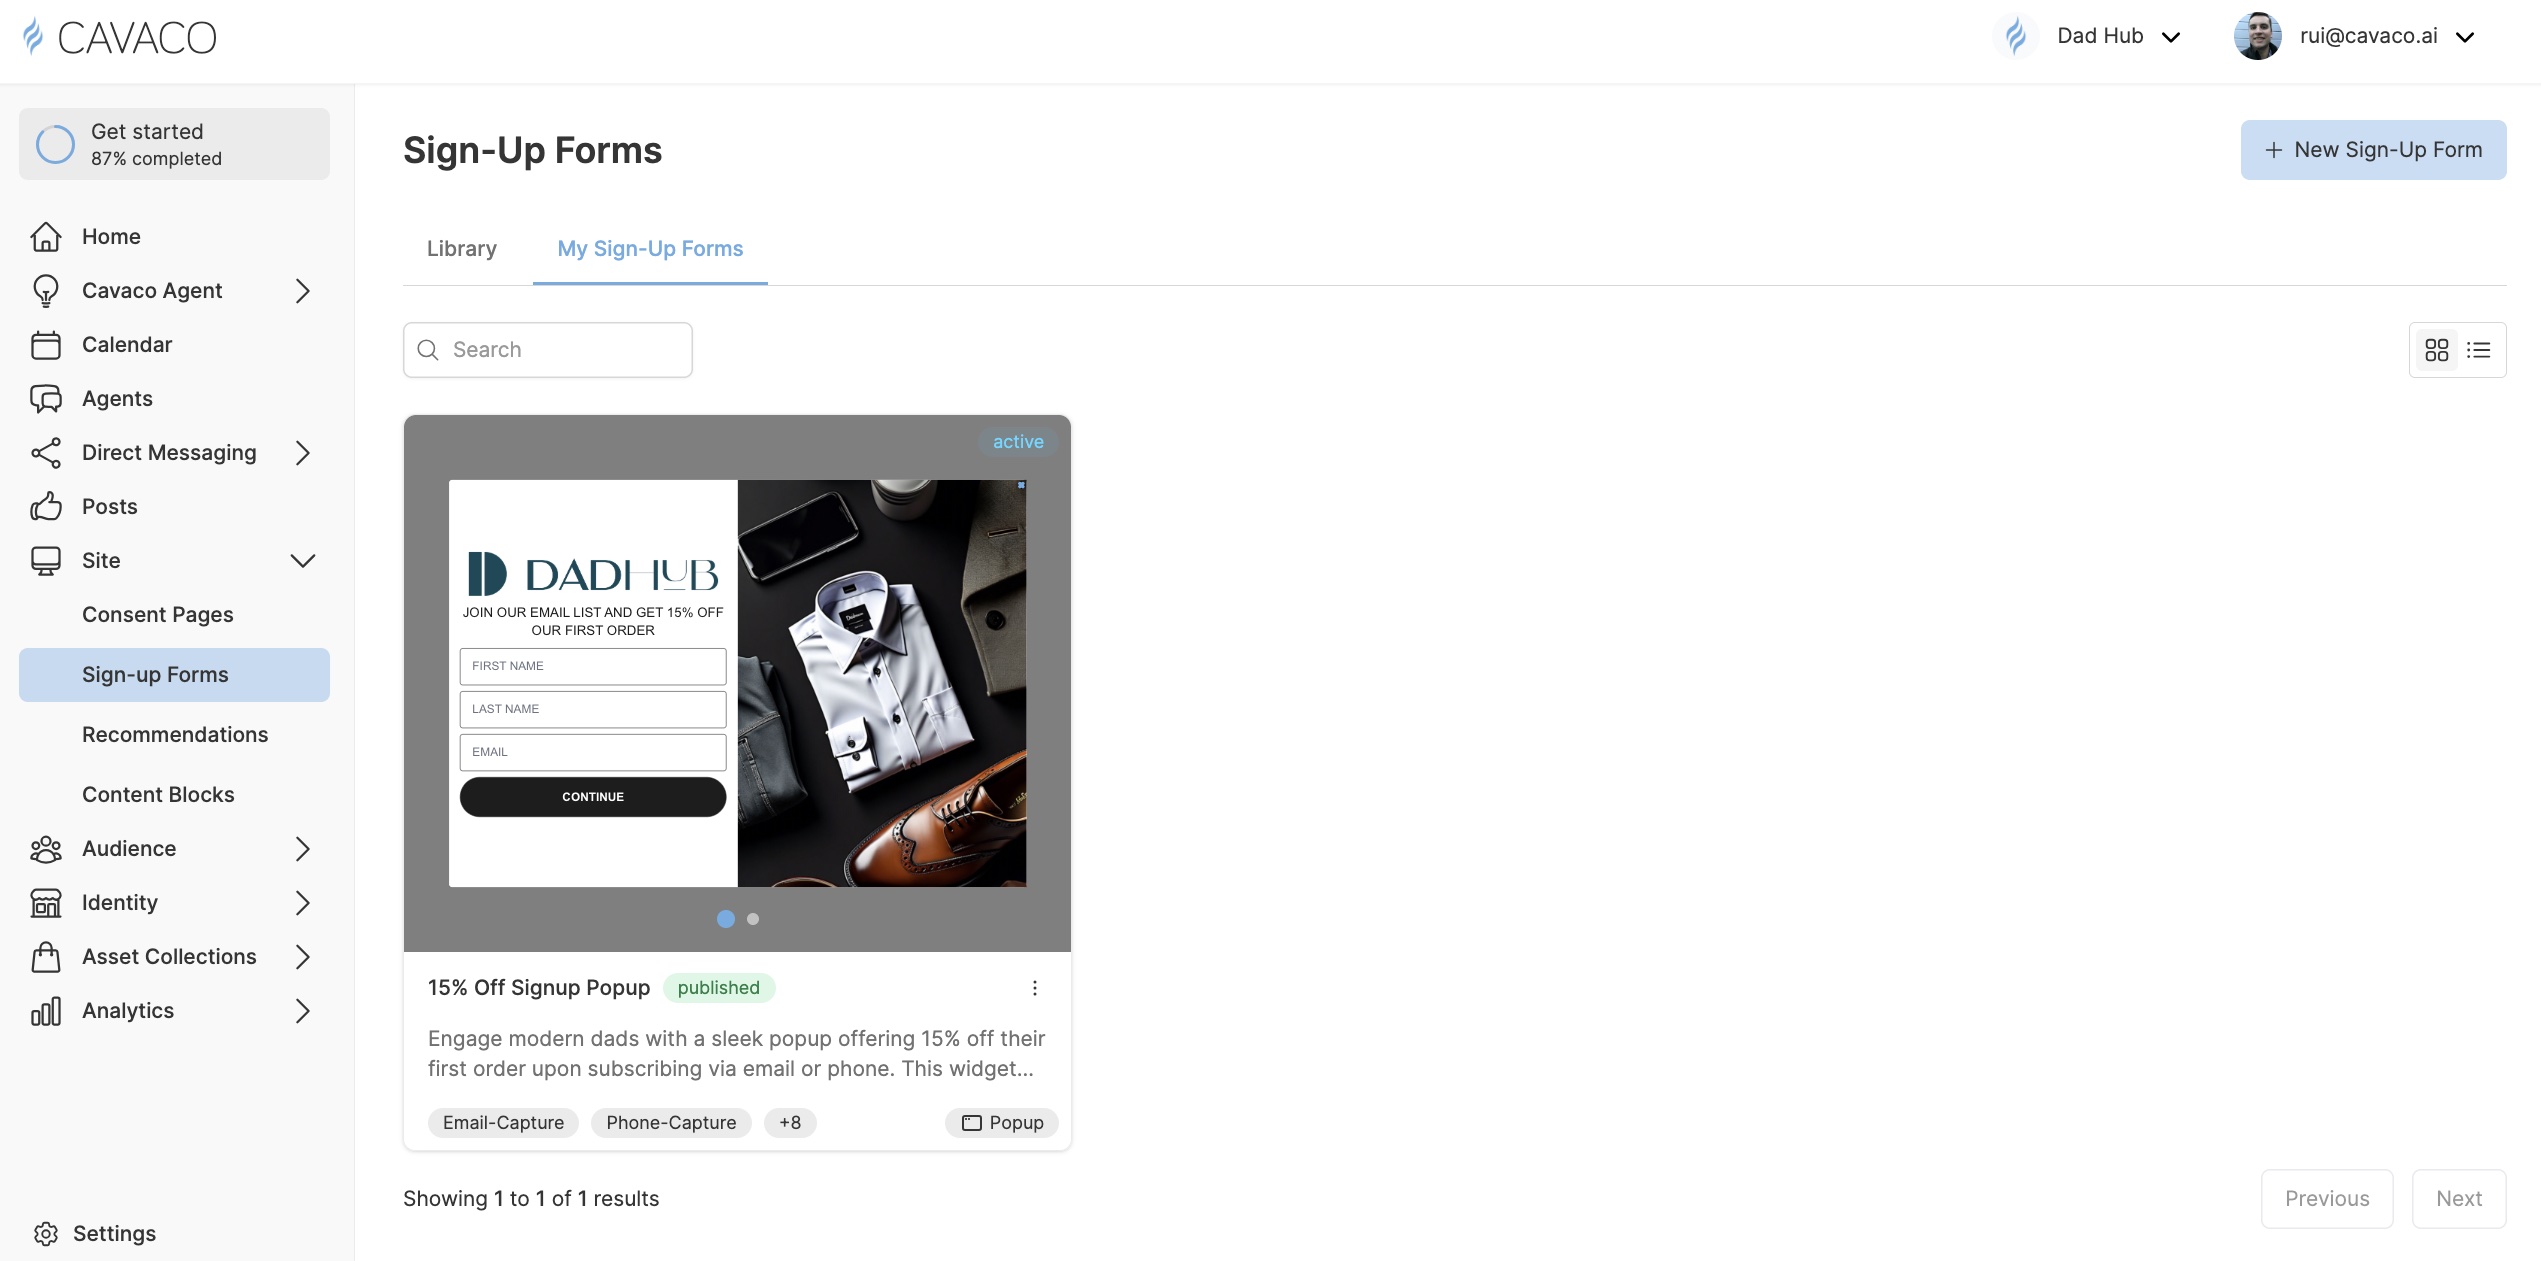
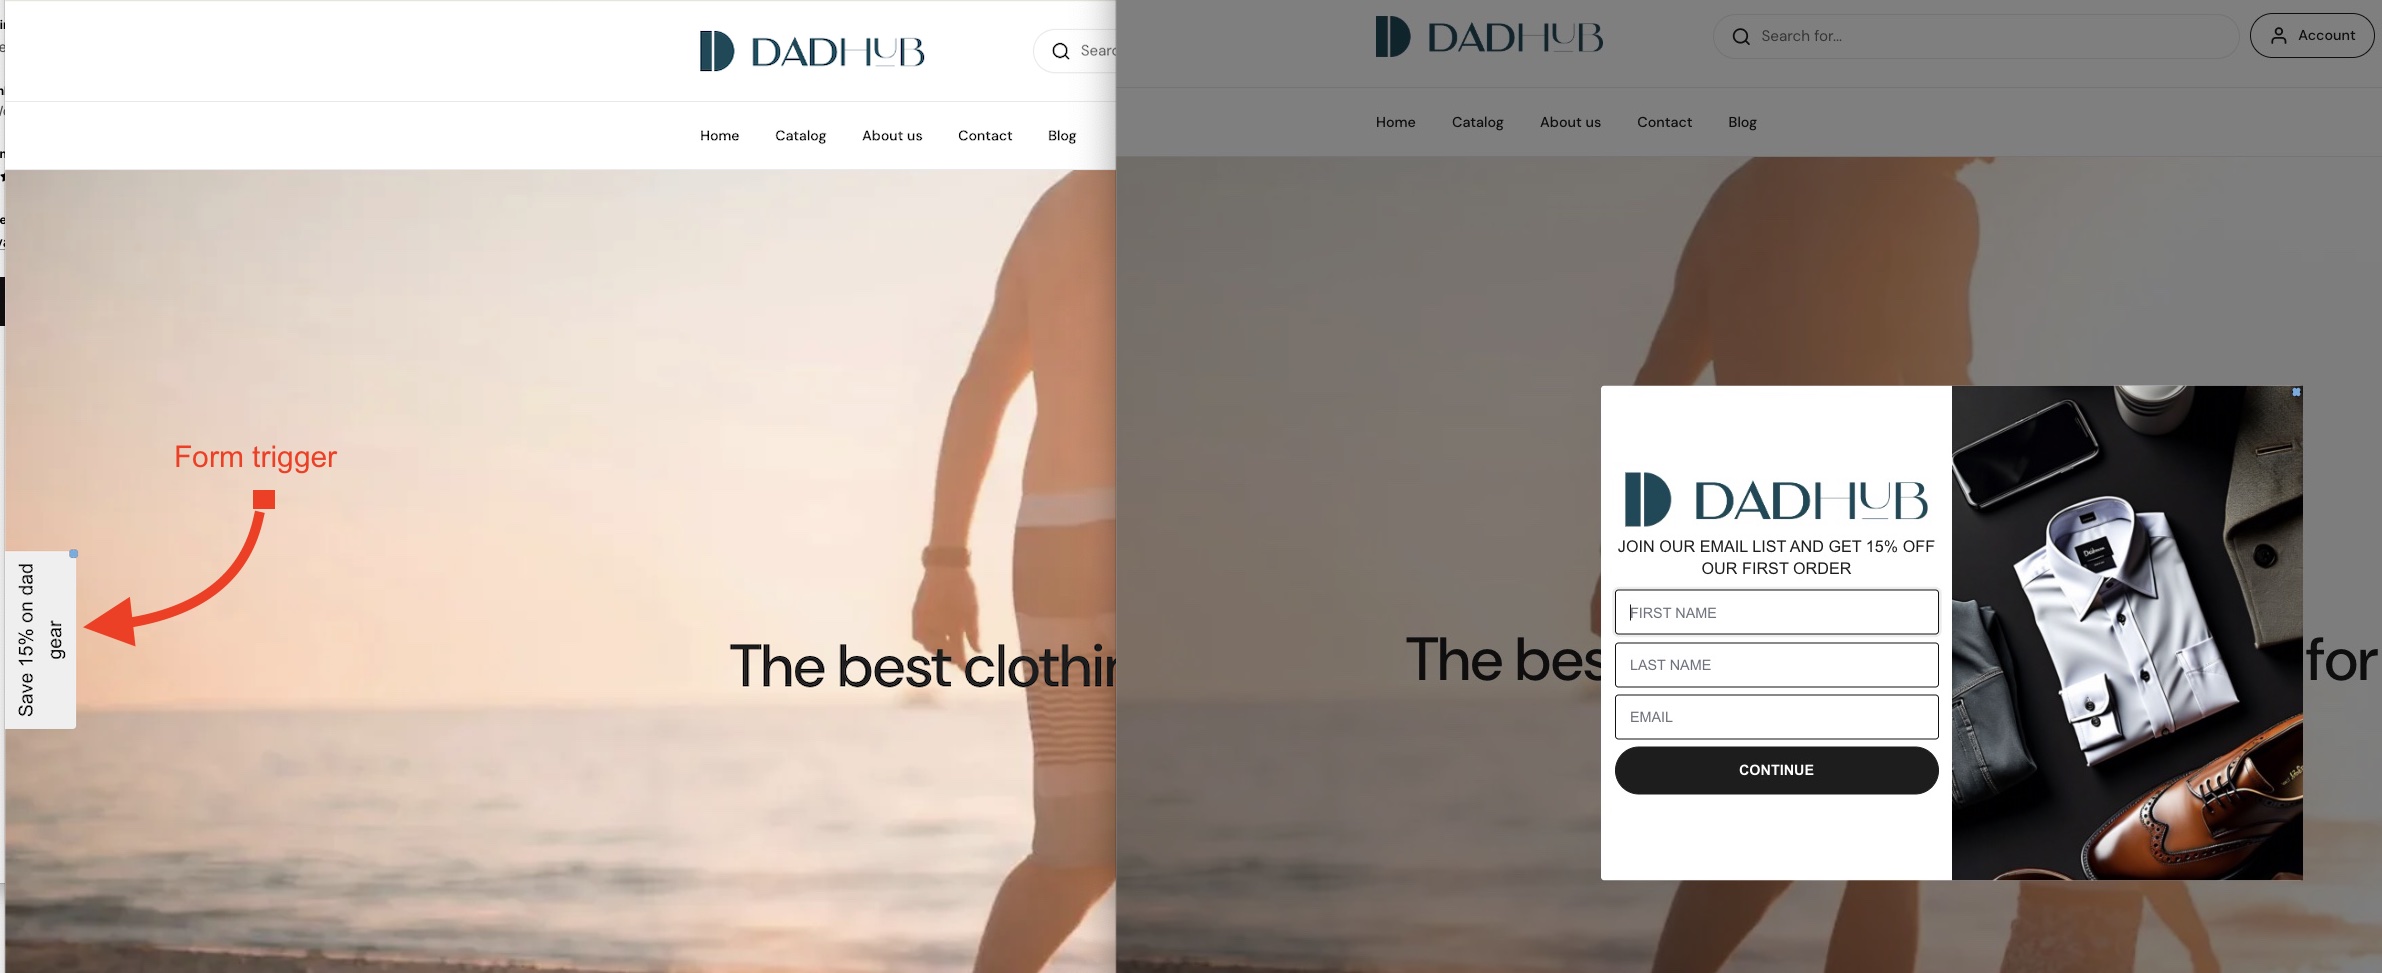
2. Form Widgets
Add Cavaco’s form widgets to your site or landing pages to collect contact data:
- Email addresses
- Phone numbers (SMS)
- WhatsApp opt-ins
These contacts will automatically flow into Cavaco’s audience segments.
3. DKIM Setup (For Email)
To send branded emails from addresses like offers@yourbrand.com, you must:
- Complete domain authentication via DKIM.
- This ensures Cavaco AI is an authorized sender on your domain and improves deliverability.
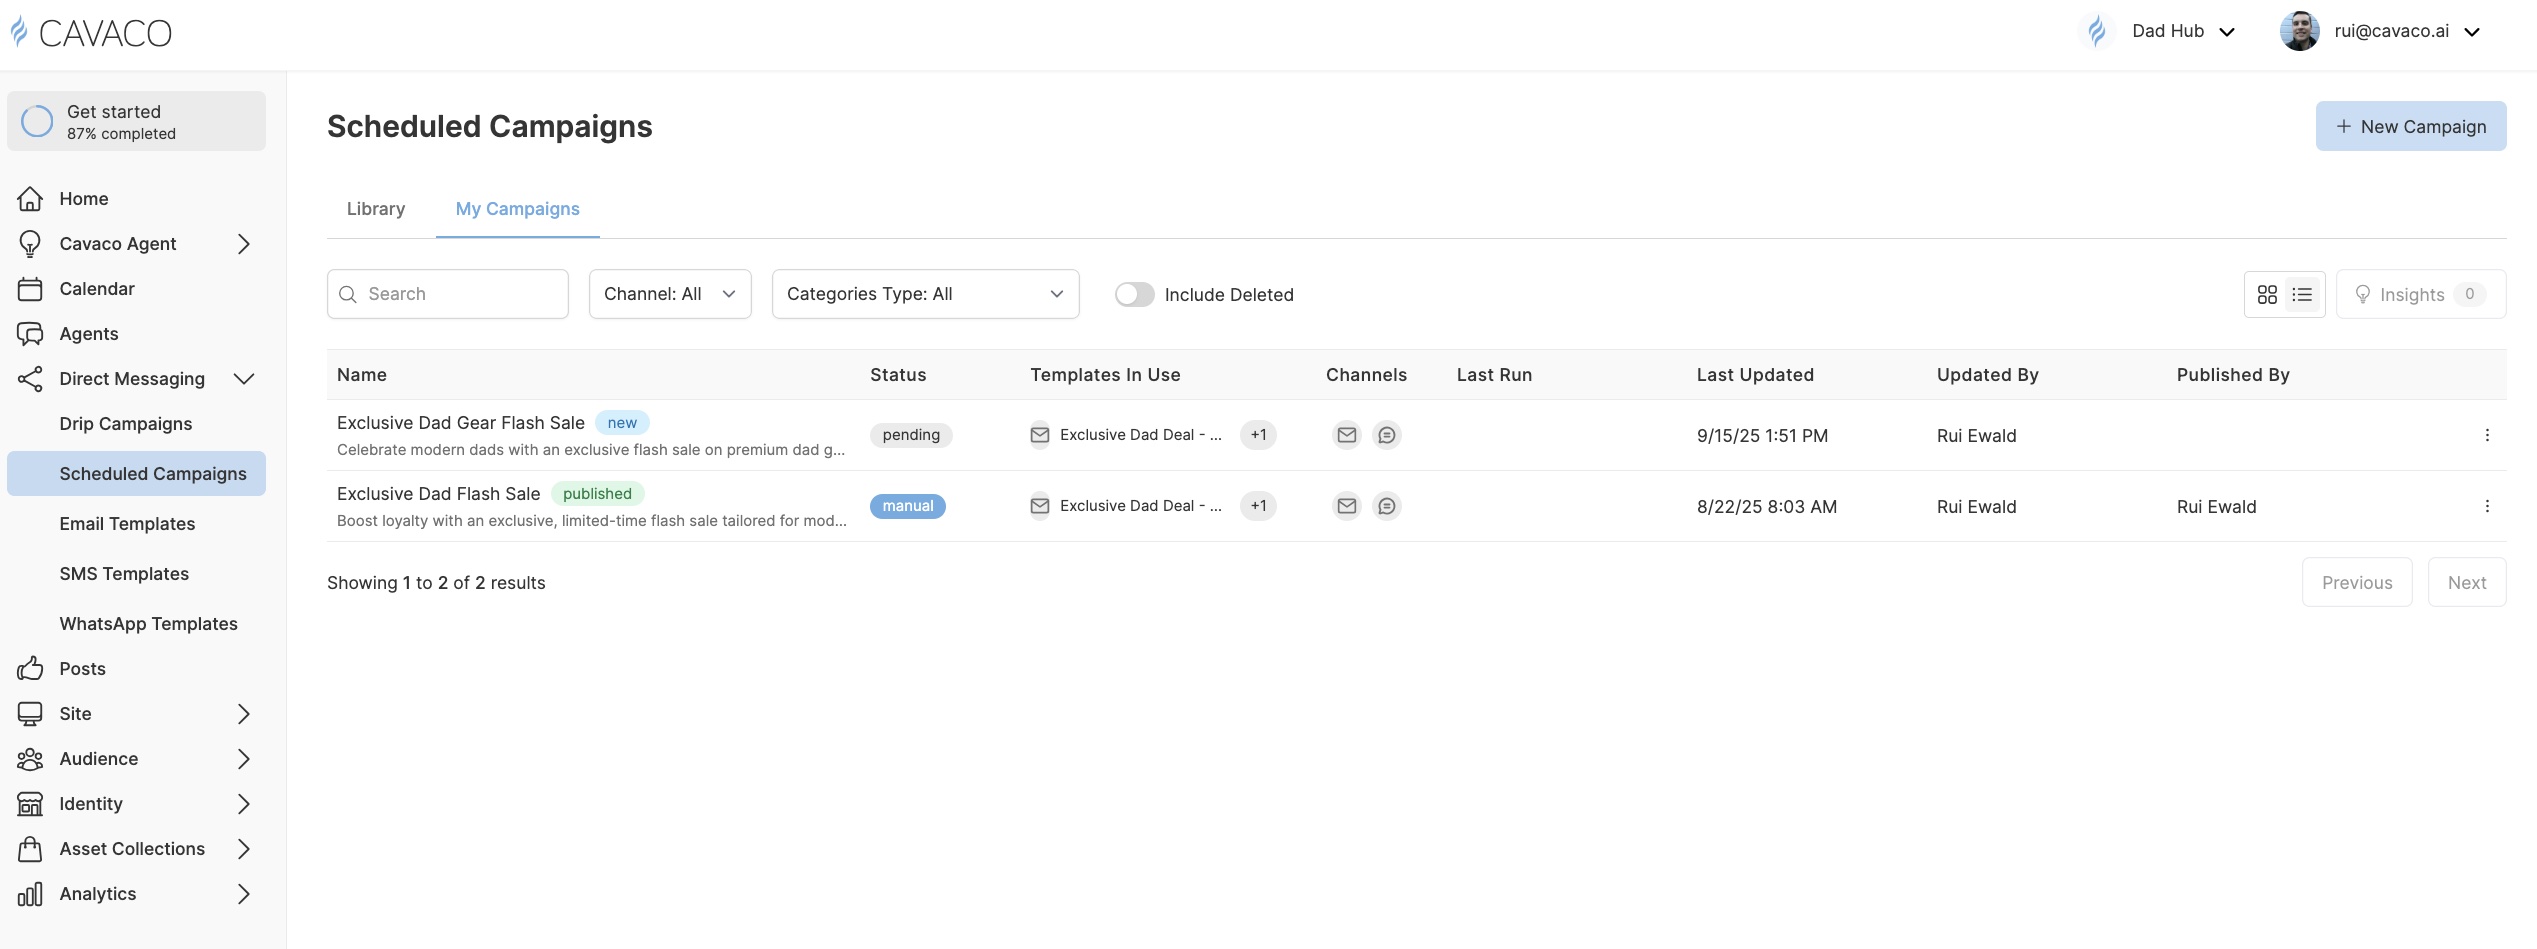
Where to Find Scheduled Campaigns
From your Cavaco AI dashboard:
- Navigate to Direct Messaging > Scheduled Campaigns.
- Choose between:
- Library: Pre-set campaign templates for ready to be adapted to your brand.
- My Campaigns: Your previously saved, or published.
Ways to Create a Scheduled Campaign

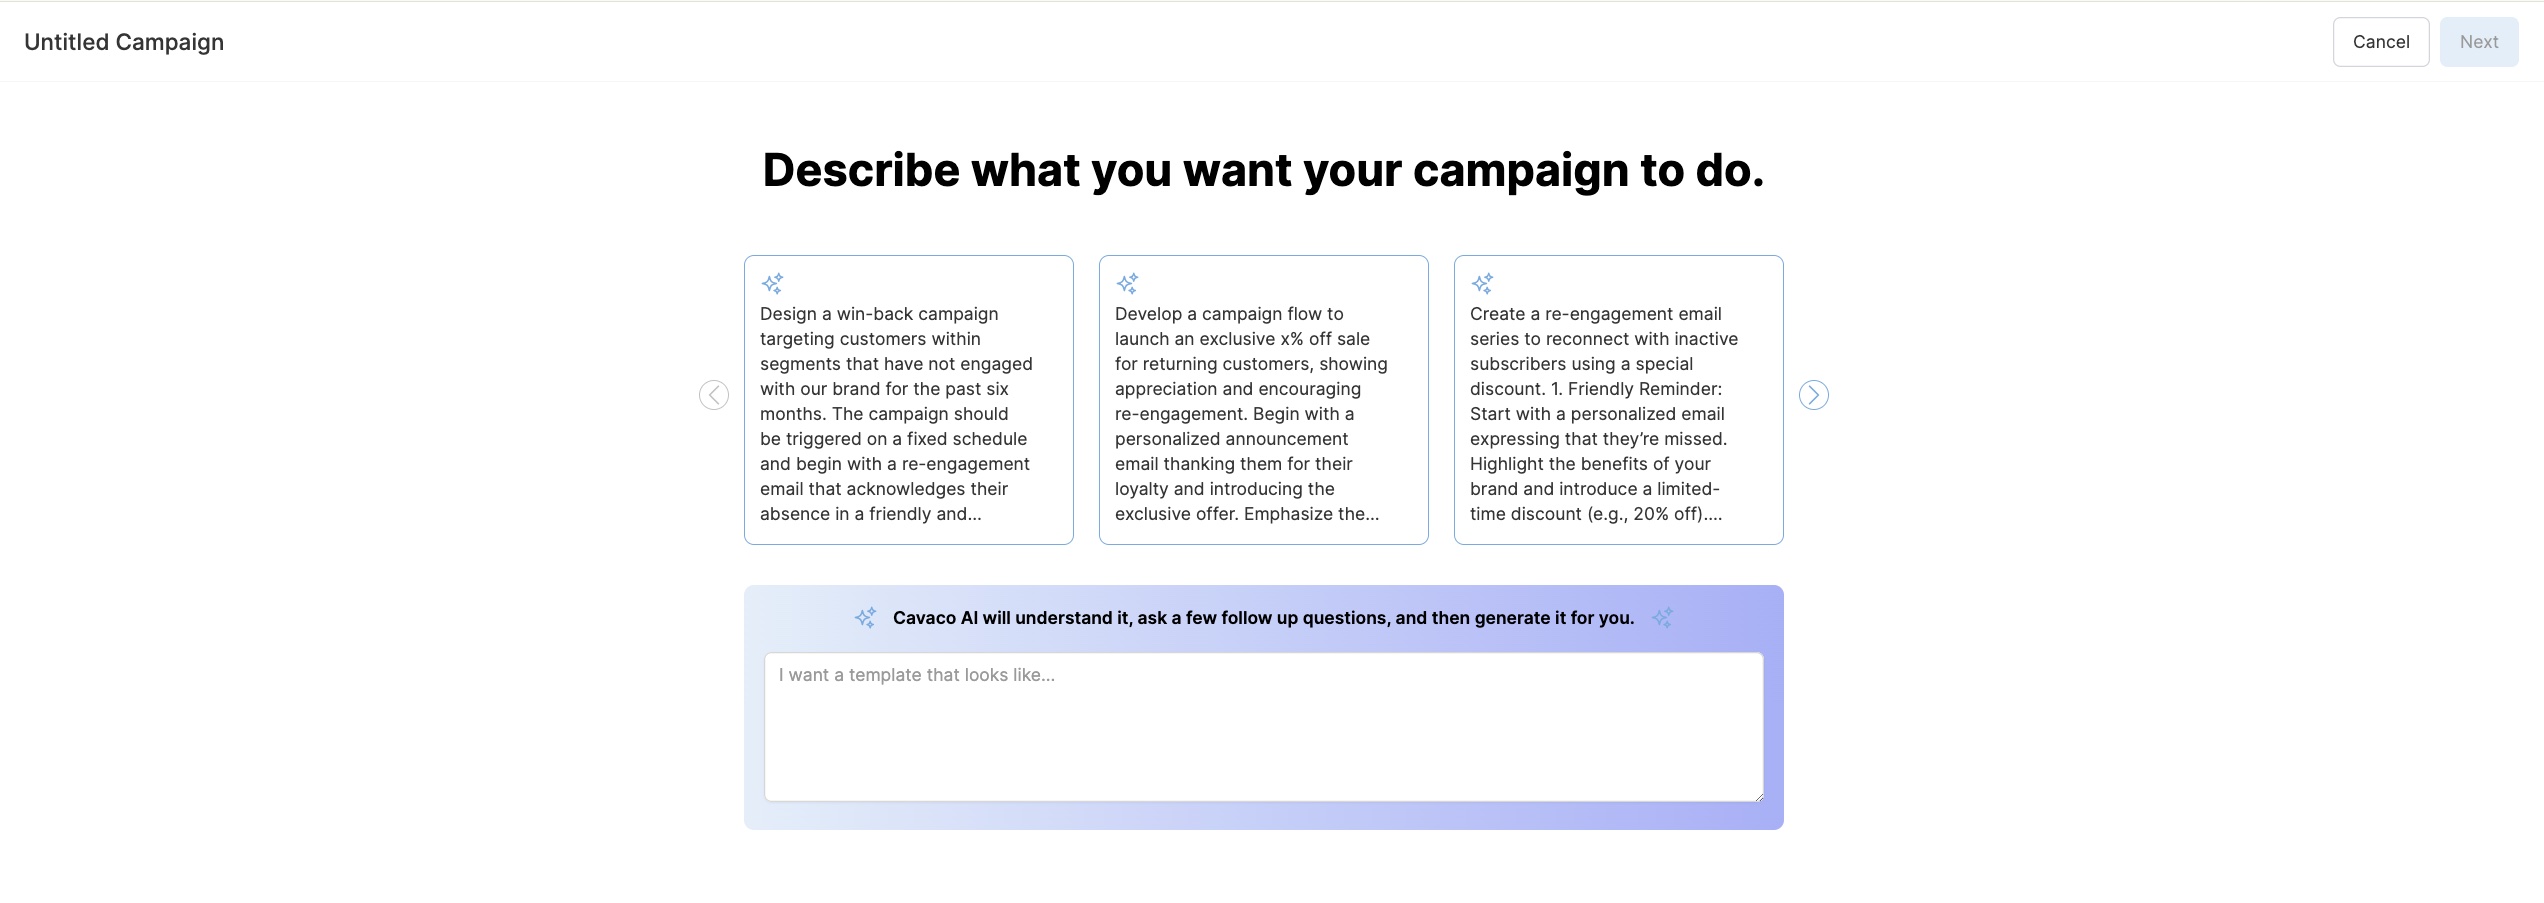
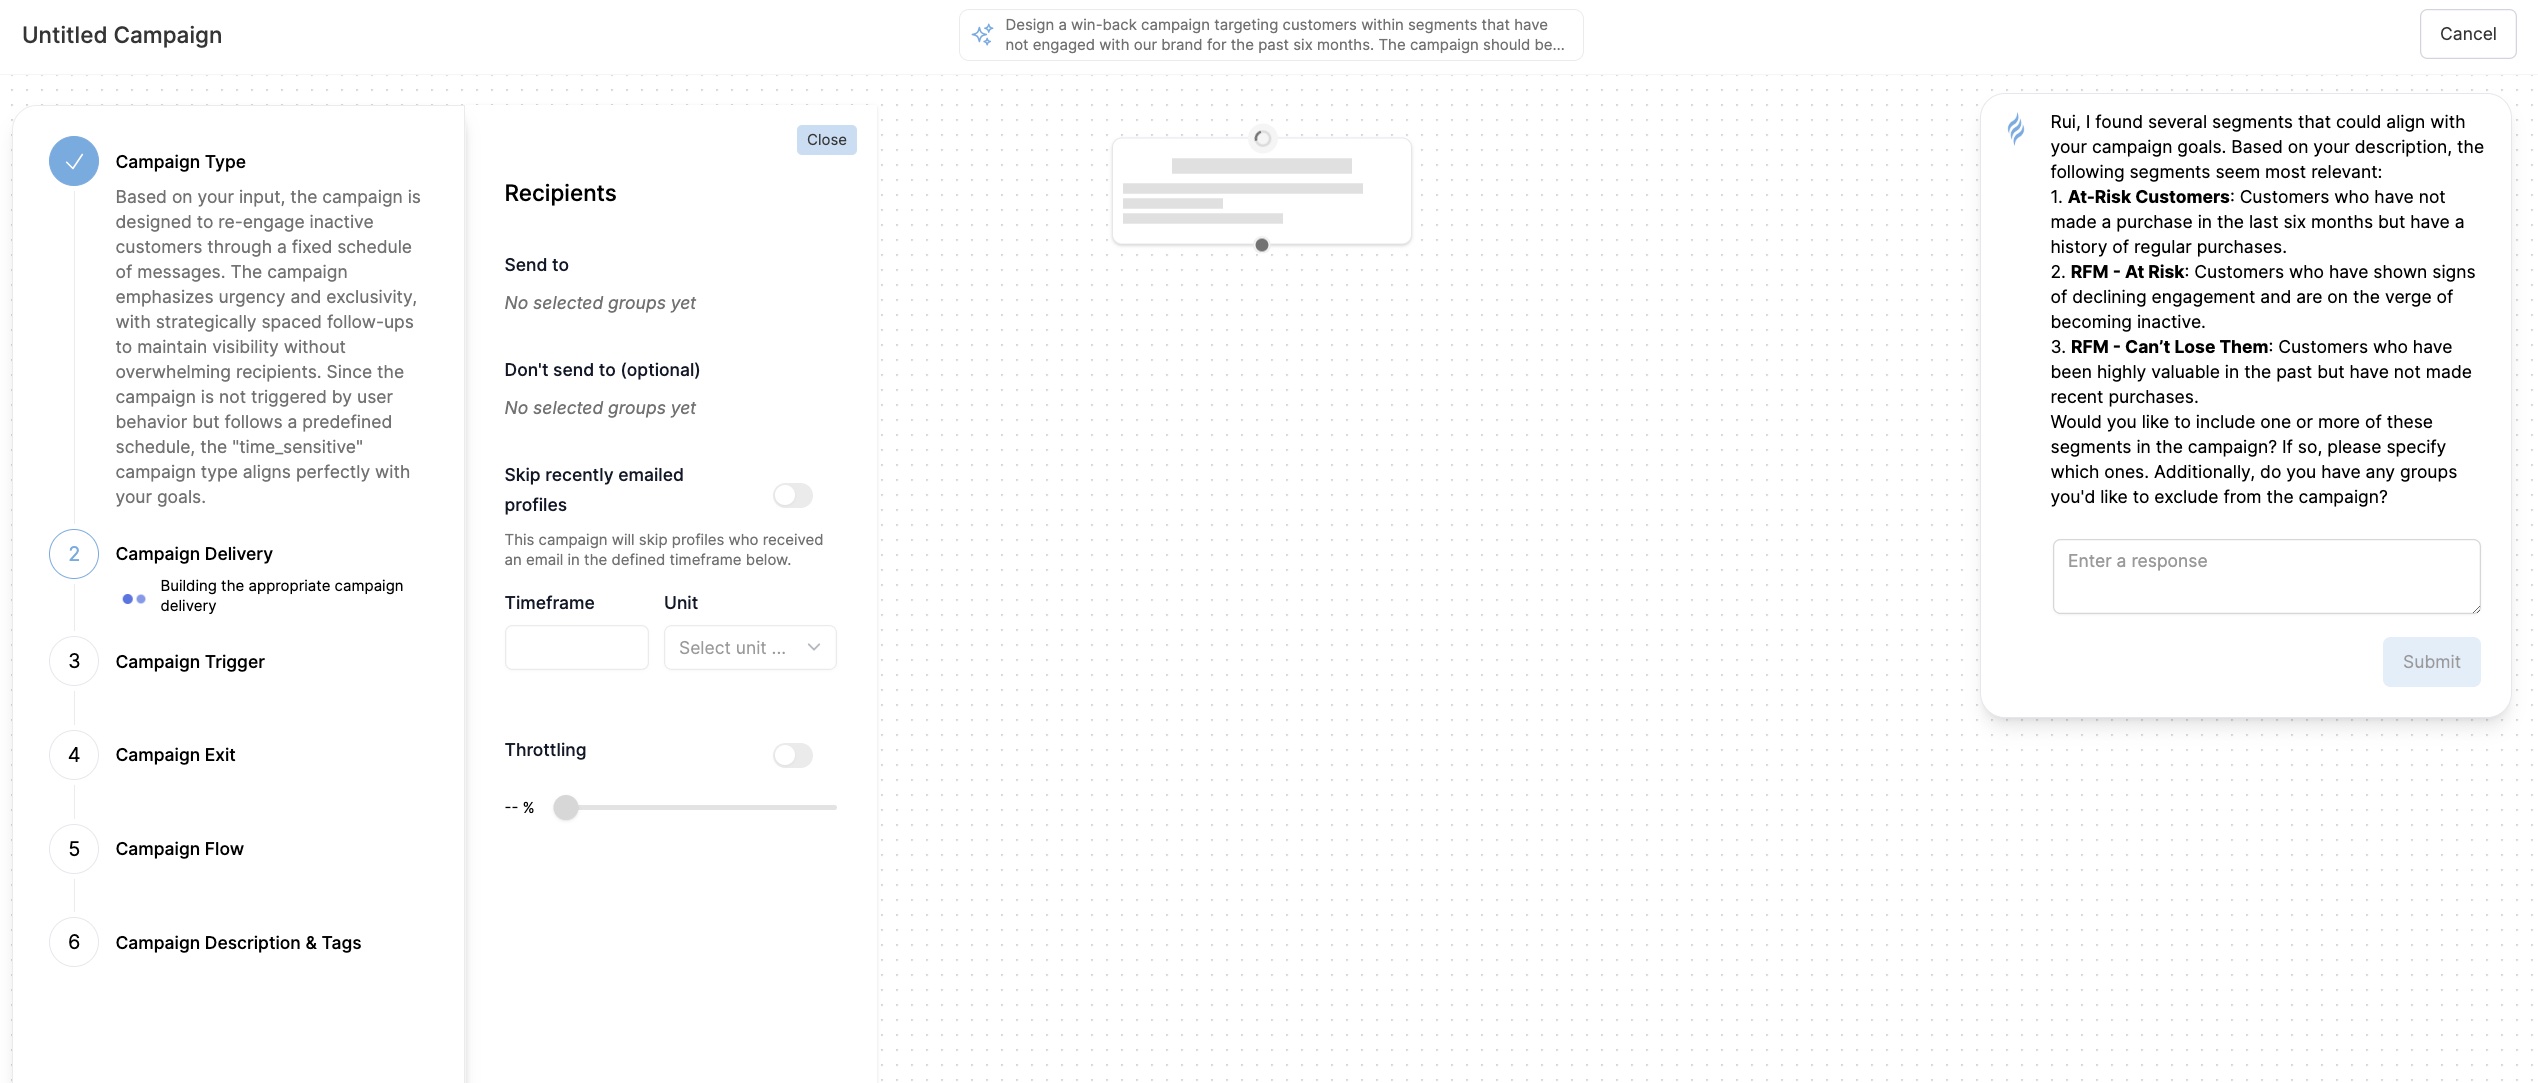
1. Use AI to Generate a Campaign from Scratch
Click Create New Campaign and describe what you want the campaign to achieve. Cavaco AI will:
- Suggest campaign flows.
- Ask clarifying questions.
- Generate an editable flow with content.
You can further tailor it by selecting marketing strategies like:
- Urgency
- Personalization
- Scarcity
- Retention

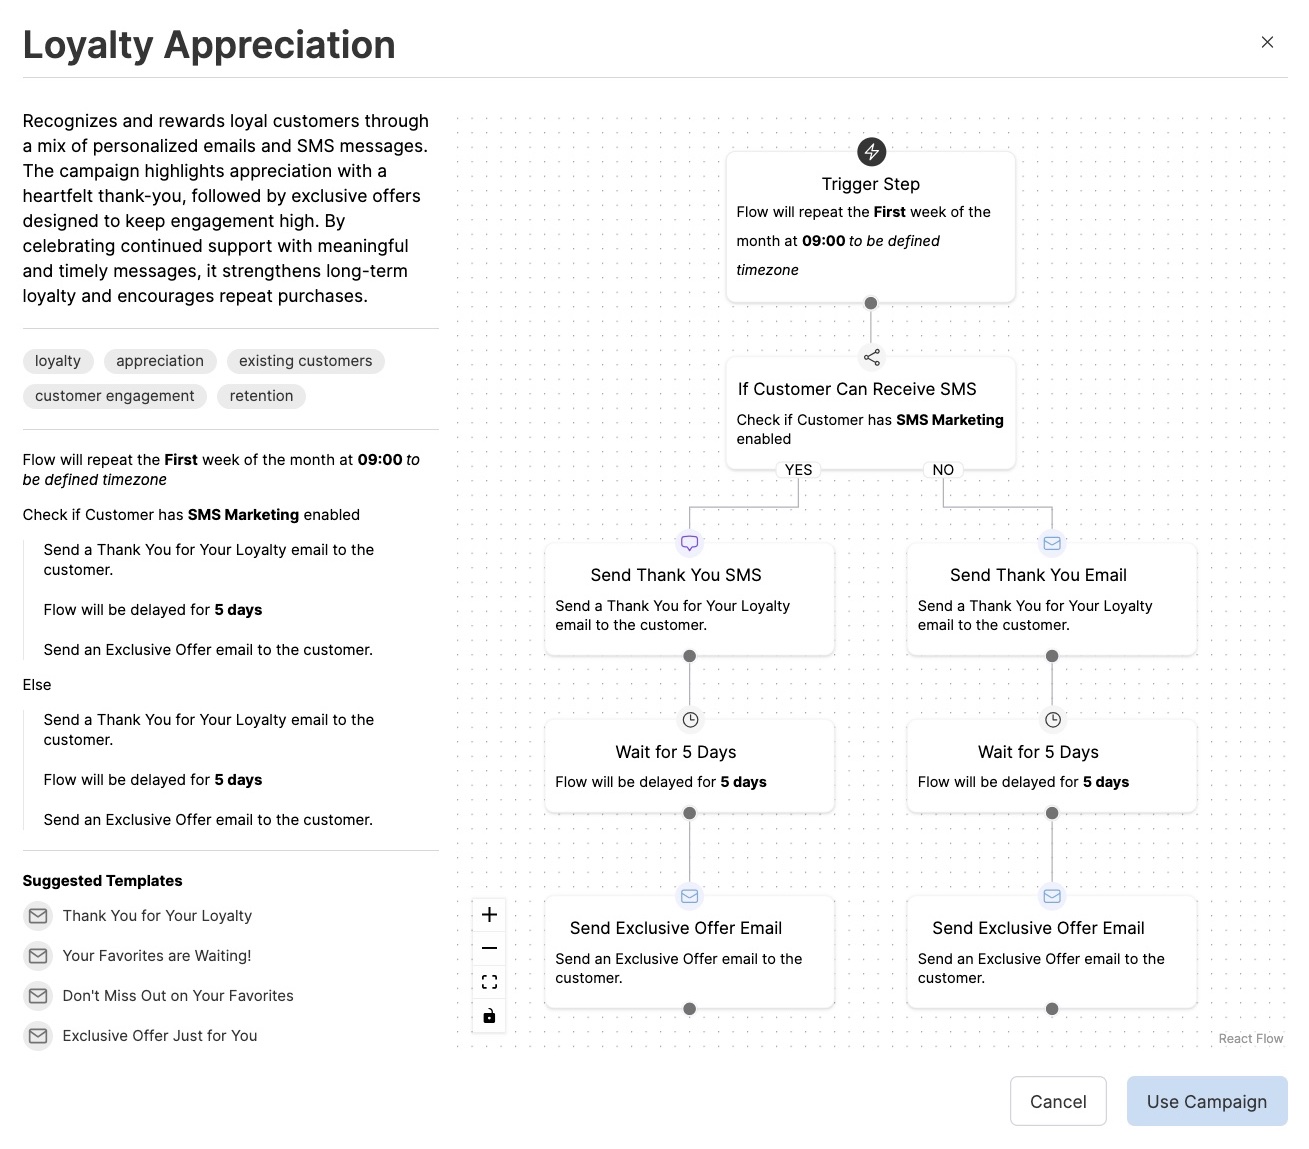
2. Start from a Campaign Library Template

Browse pre-built campaigns such as:
- Win-back campaigns
- Product launch sequences
- Seasonal countdowns (e.g., Black Friday)
Choose one and adapt the flow, messages, and timing.
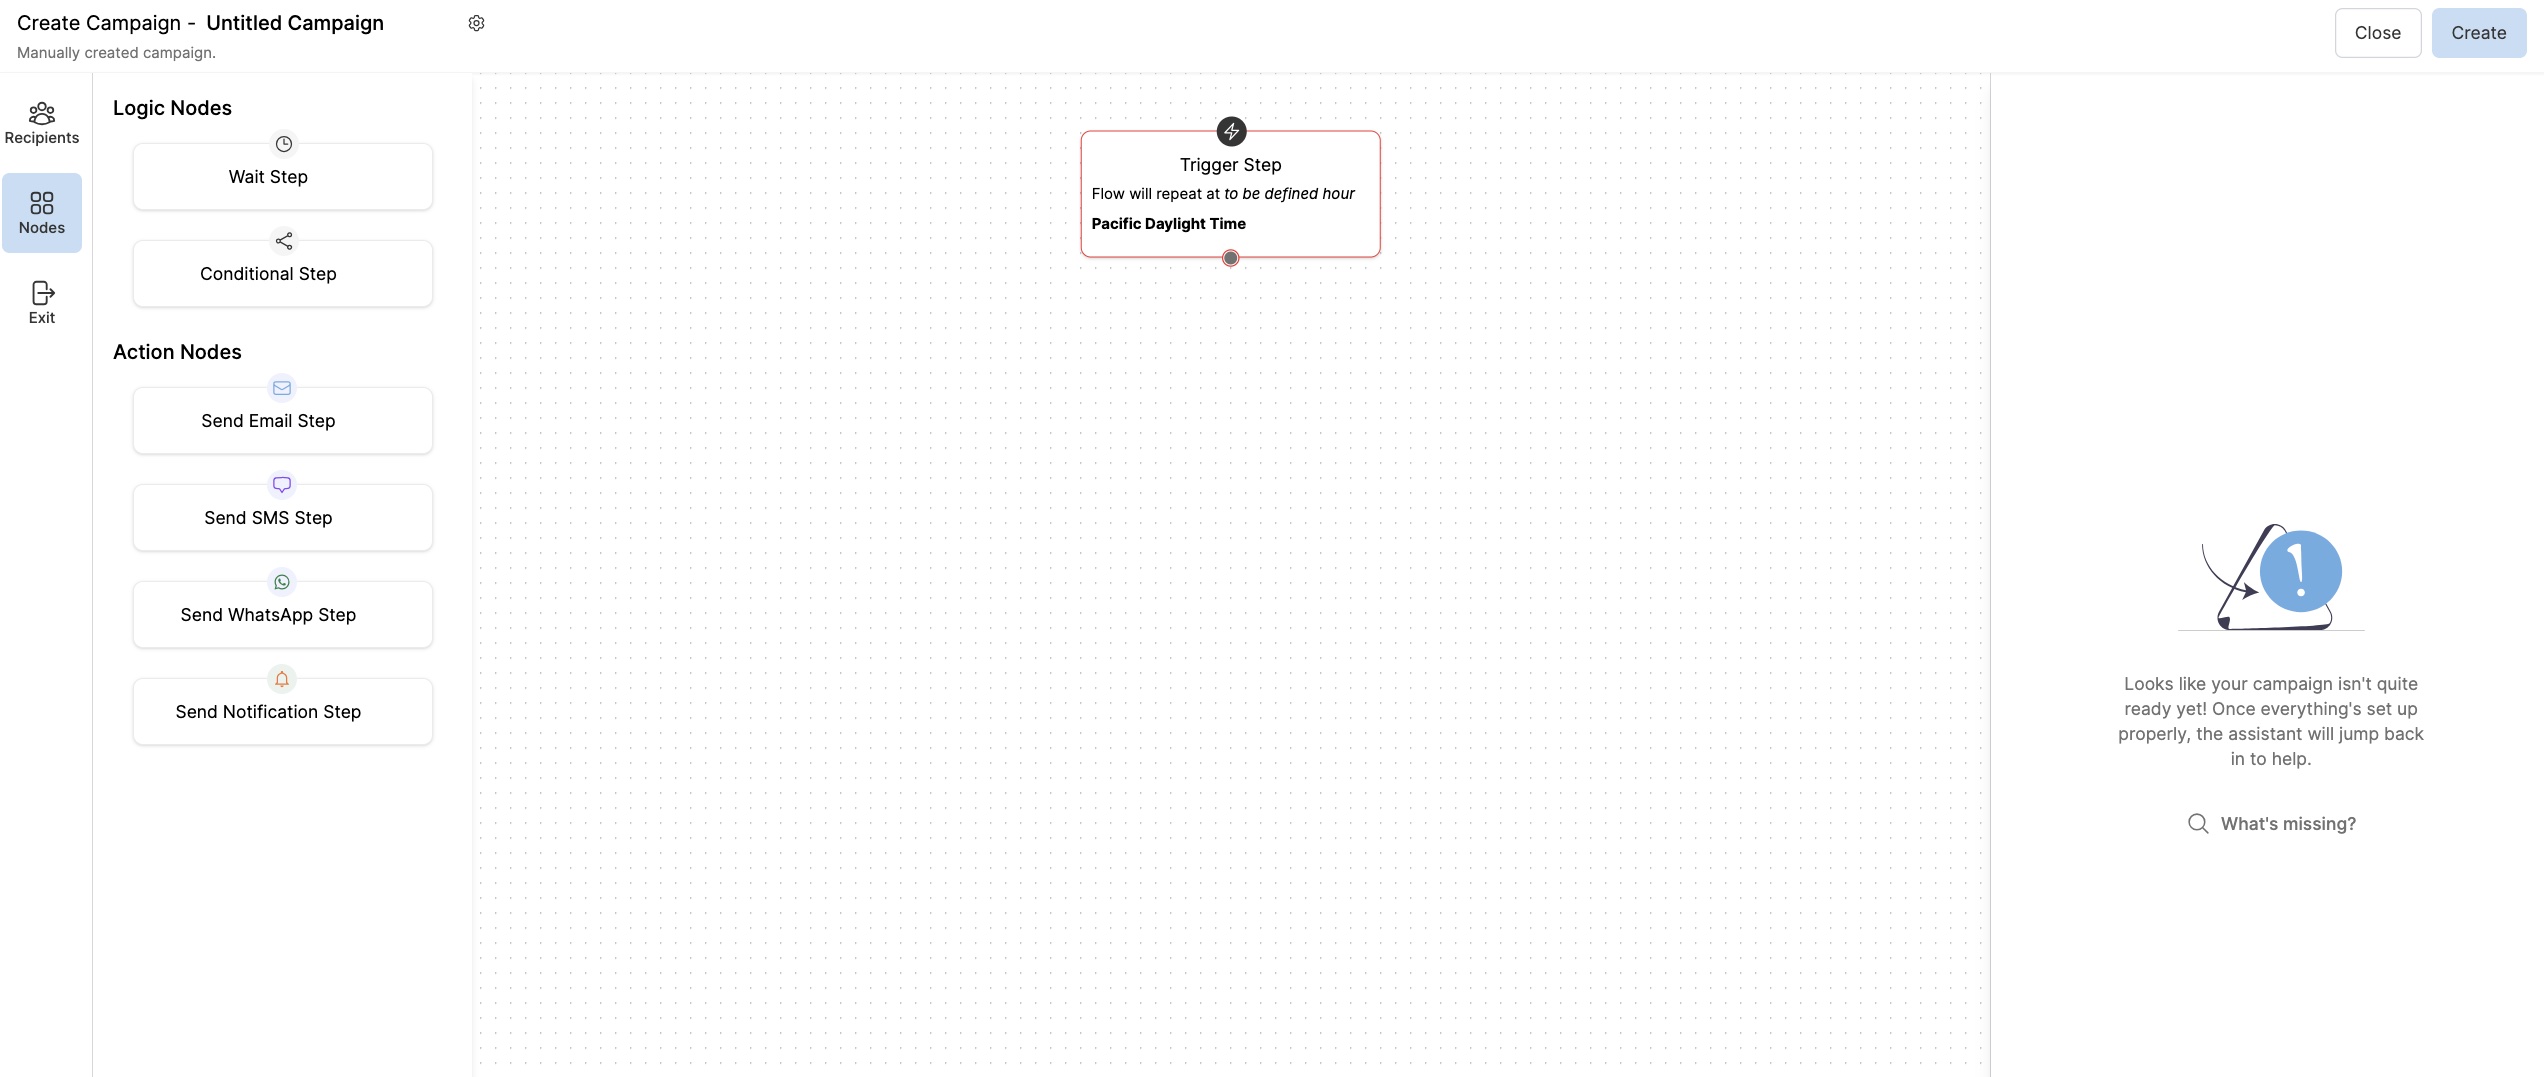
3. Manually Create a Campaign
Select Create from Scratch and use the canvas editor:
- Drag and drop nodes (Send Email, Send SMS, Send WhatsApp, Wait, Condition, Notification)
- Set campaign loop behavior in the Trigger Node (e.g., weekly, one-time, or manually triggered)
- Define recipients, exclusions, throttling, and time windows
4. Use AI-Generated Insights to Launch a Campaign
Cavaco AI surfaces Recommended Campaigns based on customer activity insights (e.g., cart abandonment spikes, inactivity in a key segment).
- These show up as recommended actions under Scheduled Campaigns > Insights
- Preview the flow and click Use to launch
insight_01.jpg)
insight_02.jpg)
Campaign Nodes and Use Cases
Logic Nodes:
- Wait Step: Add delays between messages
- Conditional Step: Branch based on profile data, prior engagement, or segment inclusion
Action Nodes:
- Send Email Step
- Send SMS Step
- Send WhatsApp Step
- Send Notification Step (Onsite prompt or browser push)
Example Use Case: Win-Back Series
- Trigger: Weekly
- Segment: At-Risk Customers
- Flow:
- Day 0: Email "We Miss You" + SMS with offer
- Day 3: Wait + Conditional (if SMS not opened)
- Day 4: WhatsApp with alternative promo
- Day 7: Final Reminder Email
The Wait Step
The Wait Step (or Wait Node) in a Cavaco AI campaign is used to introduce a delay between actions or messages in your automated campaign flow. This ensures customers receive messages with appropriate spacing, preventing fatigue and creating timely engagement.
Configuration Options
- Delay (Required):
- Specify the amount of time the system should wait before proceeding to the next step.
- Units:
Minutes,Hours, orDays.
- Delay until a specific time range of day (Optional):
- Enables you to send the next step only during a specific window, such as business hours (e.g., 10 AM–4 PM).
- Useful for SMS or email messages that perform better when delivered at optimized times.
- Delay until specific days of the week (Optional):
- Ensures the next step only occurs on certain days (e.g., weekdays or weekends).
- Ideal for campaigns avoiding weekends or aligning with known engagement patterns.
Use Cases
- Drip campaign spacing: Wait 2 days between a reminder email and a follow-up SMS.
- Time-sensitive scheduling: Only proceed to the next promotional step on a Monday or Wednesday.
- Respecting customer experience: Avoid sending messages at night by delaying until daytime hours.
Adapting or Creating Messages
When building a campaign using AI or a library template:
- Cavaco will auto-generate message drafts for each step (Email, SMS, WhatsApp)
- You can adapt these by:
- Changing copy
- Swapping images or links
- Adding personalization tokens (e.g., {{first_name}})
If you’re using a fully manual campaign, you can:
- Create new message templates or
- Reuse existing ones from your template library
We recommend checking out our Creating and Editing Messages article for more on this.
Reporting & Analysis
Cavaco provides multiple levels of reporting:
Built-in Reports
- Campaign-level performance (Opens, Clicks, Revenue)
- Step-by-step delivery stats (Email, SMS, WhatsApp)
Single Message Reports
- Analyze individual message effectiveness
- Compare versions (A/B testing support)
Custom Reports
- Use Cavaco AI to ask questions (e.g., "Which SMS campaigns generated the most revenue last month?")
- Or select from visual charts (bar, trend line, pie)
- Export and share with your team
Related Topics
- How to Set Up SMS Messaging in Cavaco AI
- Creating and Editing Email, SMS, and WhatsApp Messages
- Audience Segments and Consent Best Practices
- Troubleshooting Scheduled Campaigns
If you're ready, head to Direct Messaging > Scheduled Campaigns > Create Campaign and try building your next one!